
The Duck Gybe, Toe to Heel
Technique / Wing Foil
Welcome back! It’s always exciting to introduce a new move, and in this issue, we’ll be guiding you through another absolute gem, the toe-to-heel Duck Gybe. Assuming that you’ve been working on the heel-to-toe Duck Gybe, you’ve hopefully fallen head over heels for this fun and functional method of gybing. Well, rather than let you bask in the glory of your achievement and rest on your laurels, it’s time for a fresh challenge; do it the other way, toe to heel!
The toe-to-heel Duck Gybe has a few little quirks of its own, so we highly recommend that you already understand the ducking action, even if it’s the other side. And you need a solid toe-toe-to-heel gybe down pat to concentrate on juggling the wing. The primary and rather noticeable difference with the toe to heel is that you’re entering riding toeside. This makes things a little bit awkward and less intuitive.
As you love the other duck gybe, let’s examine which parts will try to trip you up.
Initiating your gybe. When learning this, you must bear away from the wind and get your carve on. However, you need to do this without using the wing for support, a habit many of us develop in our toe to heel gybes. You must be balanced, standing over the board, not hanging off your wing.
Now add to this how you usually bear away—pushing the wing forward towards the nose of your board and the outside of the turn. You just can’t do it here as much. You need to get the wing inside.
Getting the wing across your board into the ducking position. You’ll be facing the opposite way from the toeside, so you’ll have to make a real effort to twist your trunk sufficiently to get the wing inside.
Timing. You’re looking for that same golden egg when the wing can be sheeted i,n, and you can release your front and duck it. It’ll be harder to find if you carve too quickly/hard. A longer carve is preferable. It can be easier to bring your back foot forward a touch and ensure it’s well offset so that if you weigh your heels, it won’t pitch your round uncontrollably.

Lifting before power. This one is similar to your last duck gybe. You must first position the wing on your exit before you apply any power to it. This means keeping the front hand close as you lift the leading edge and the rear hand away as you bring it down.
With these points in mind, let’s ponder how to make the toe-to-heel duck gybe a reality.
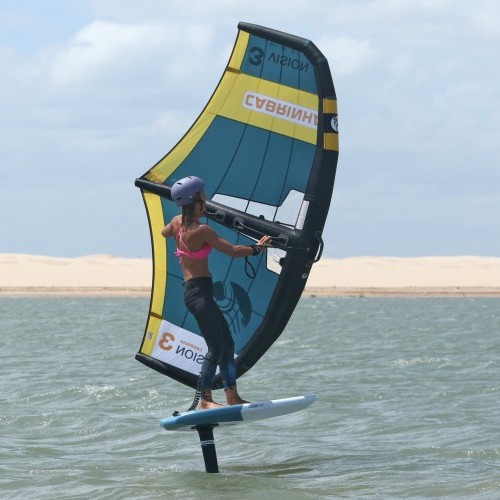
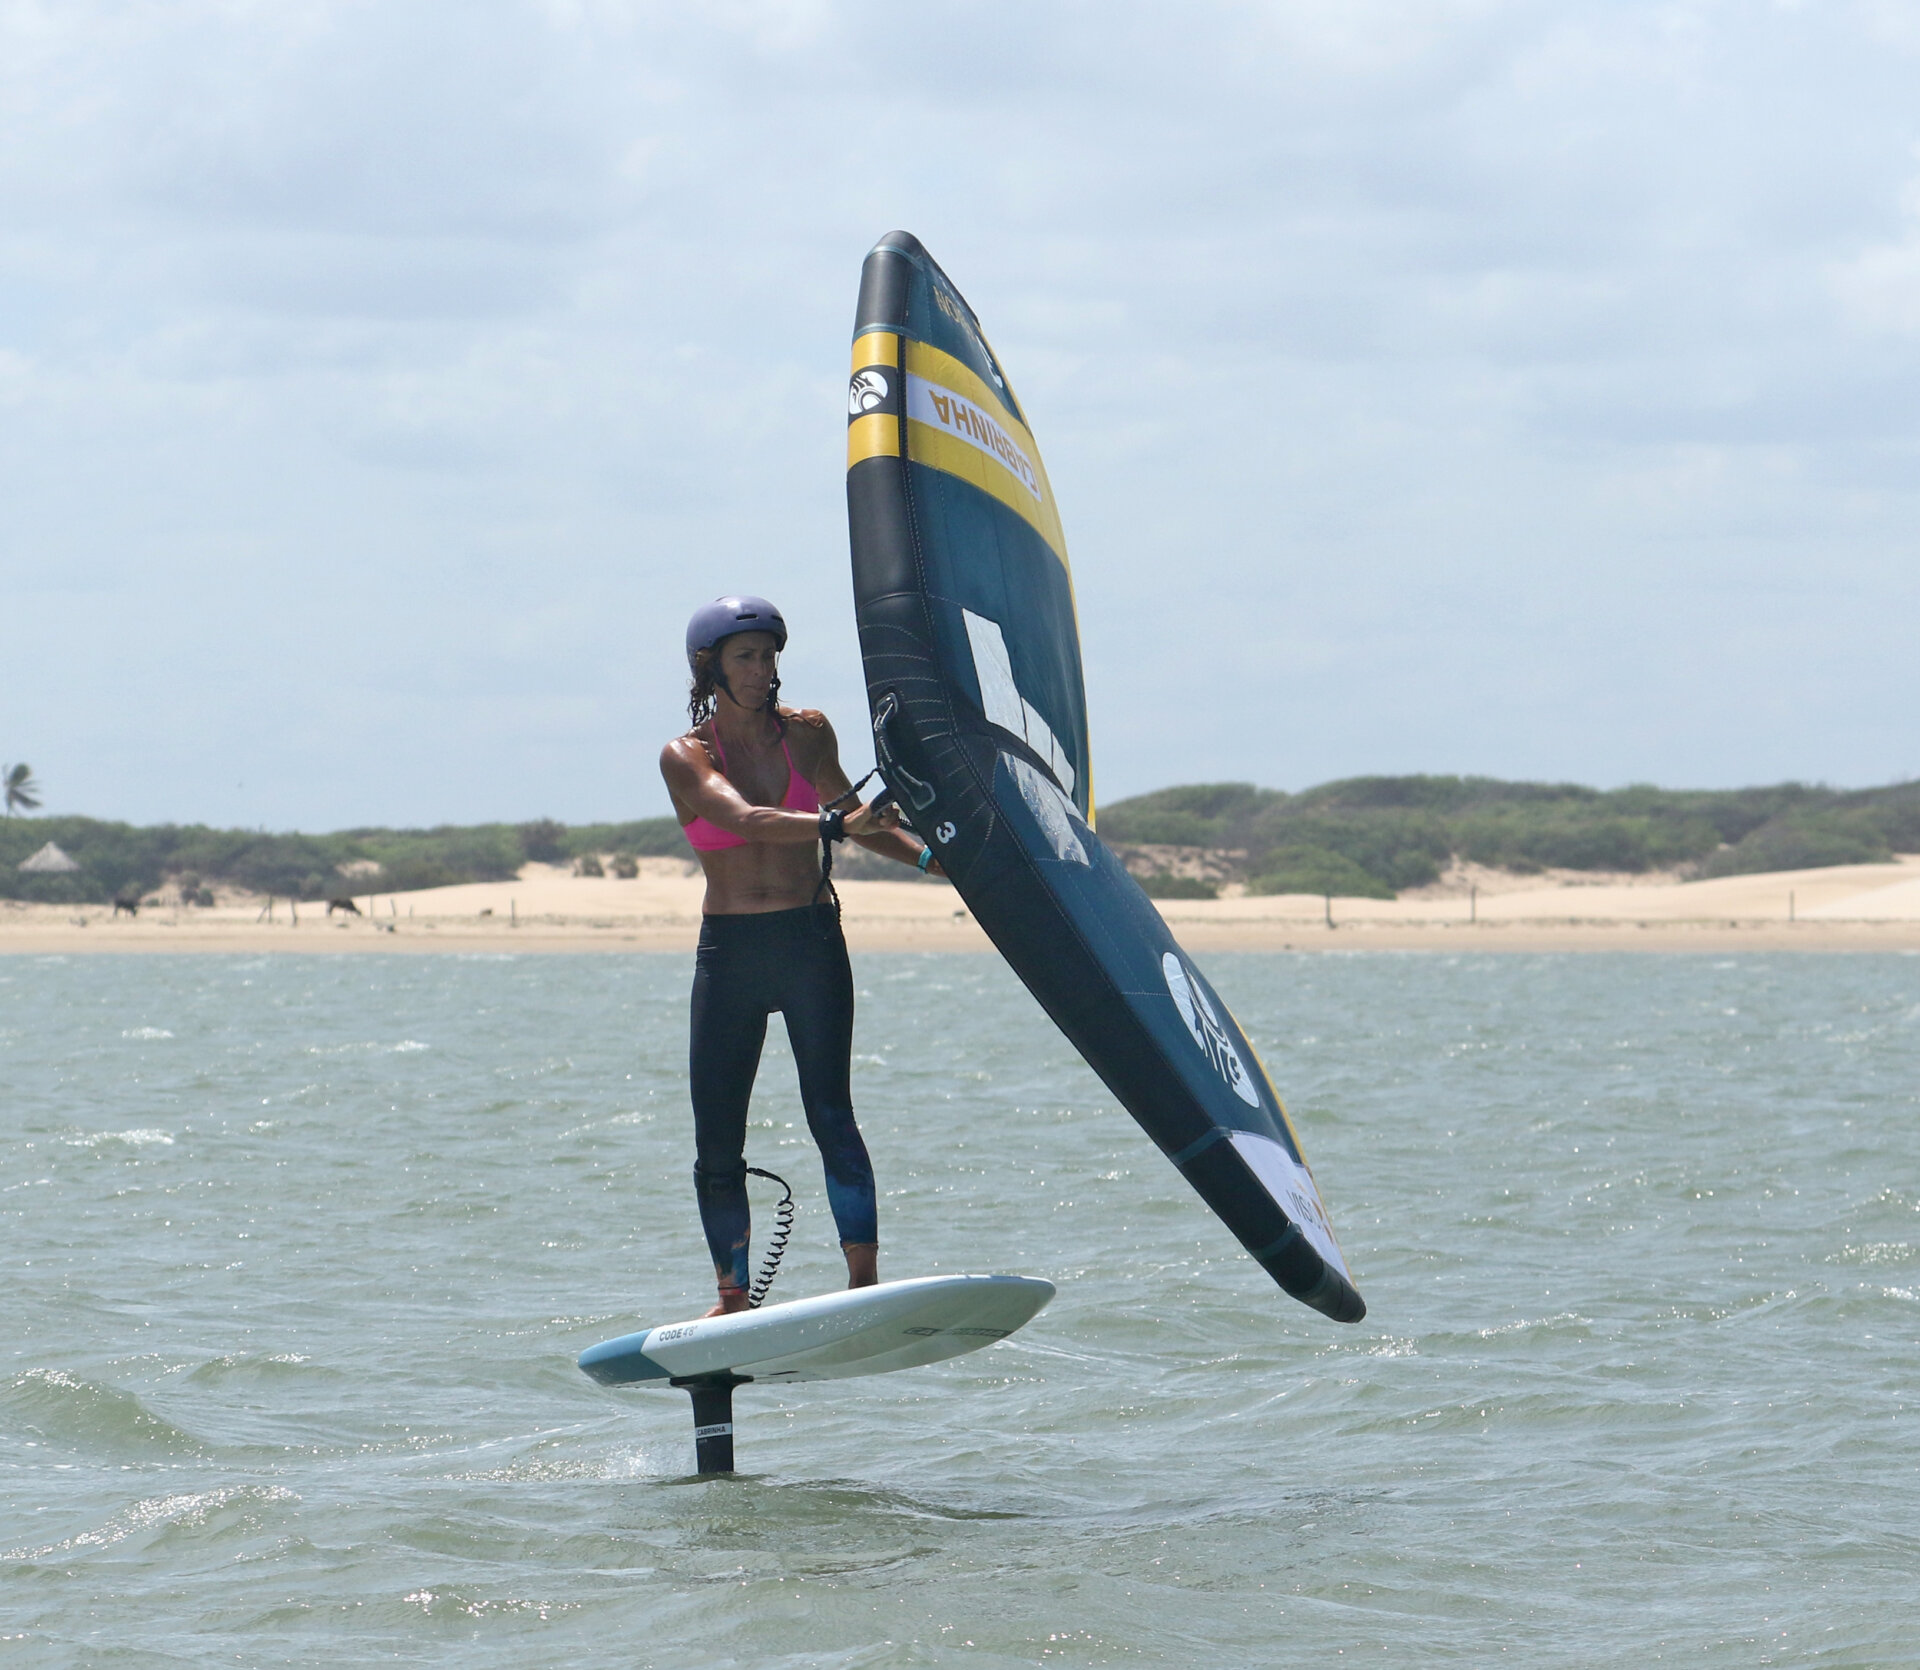
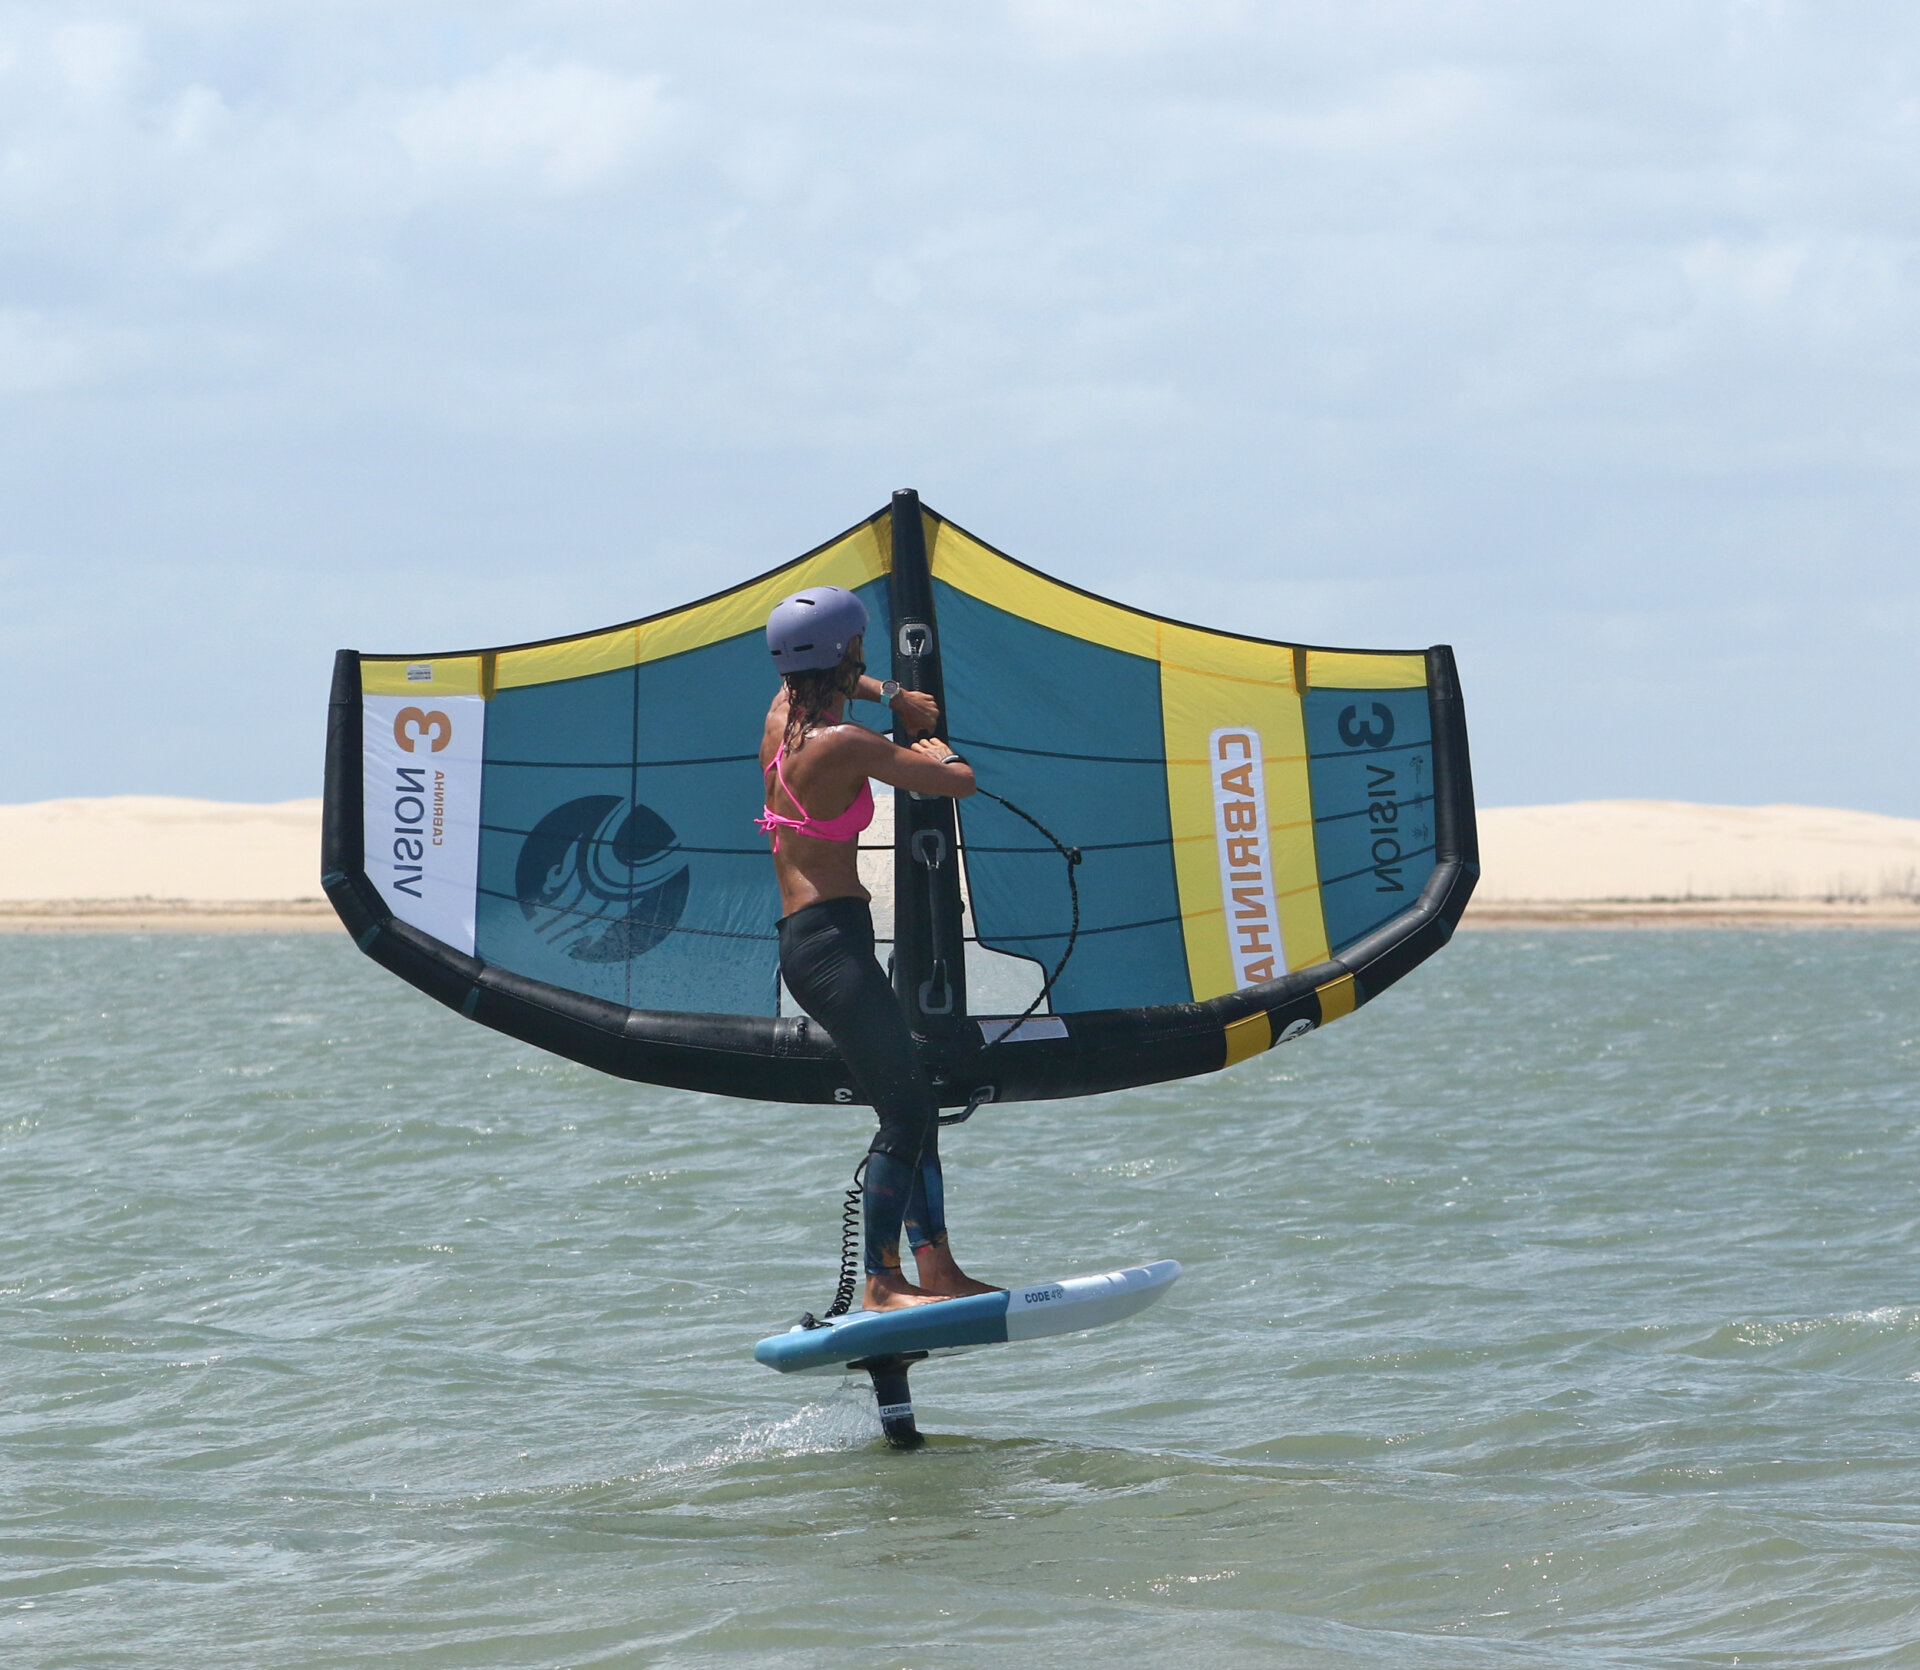
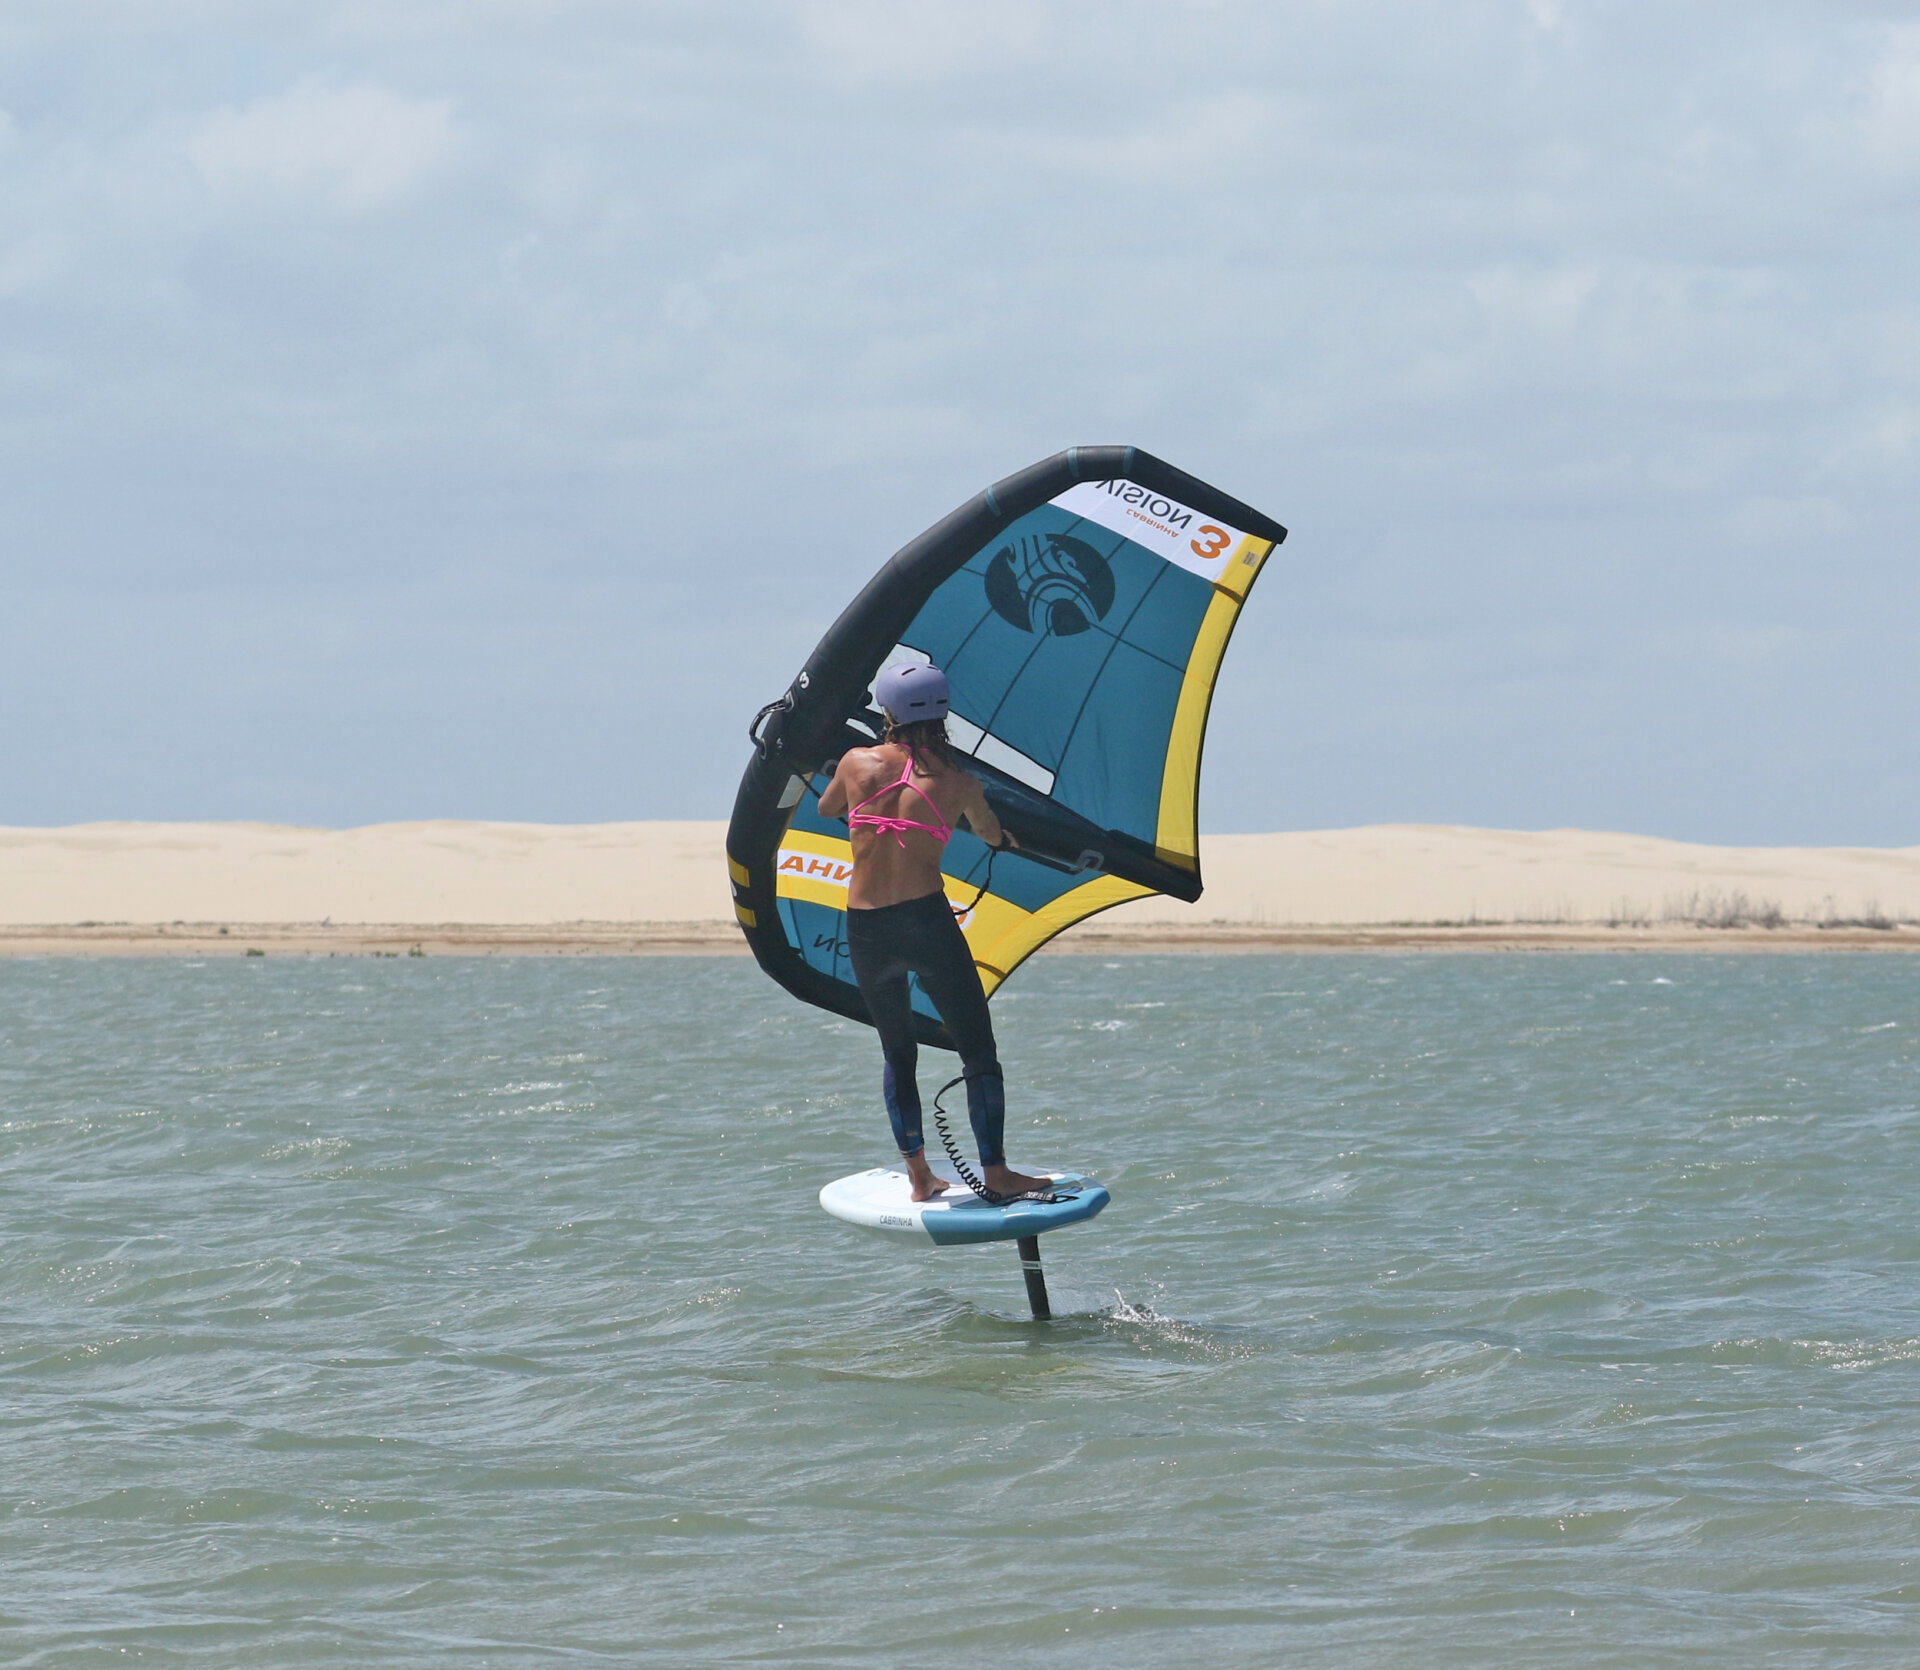
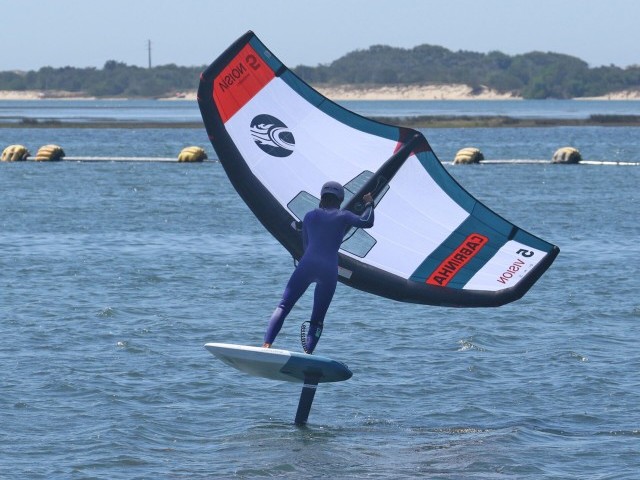
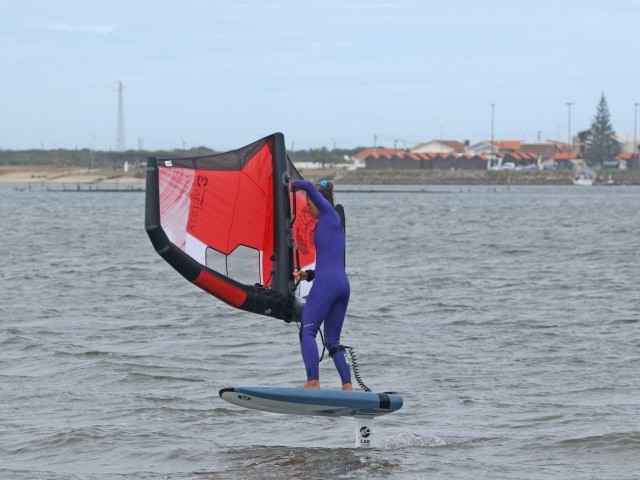
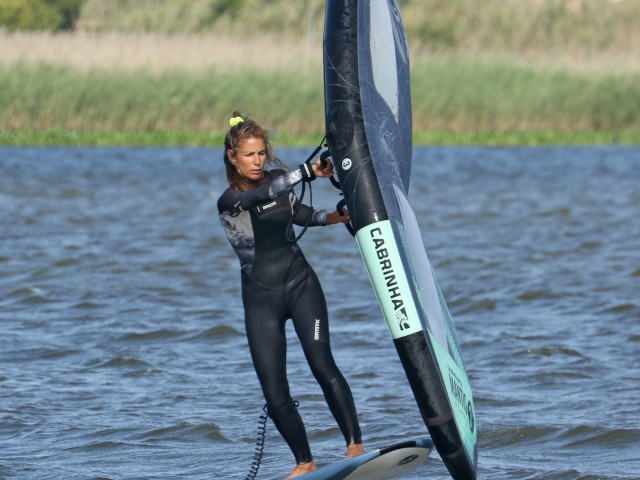
Approach and Set Up Pic A.
Approach toeside, heading gently upwind with your wing relatively low and pointing forward; this way, you can stand balanced on the board and not support yourself by leaning out against your wing. Move your front hand forward on the handle, so the wing can’t push as far forward. It can help to hold the back handle a tad further forward to keep the wing up and away from the water when you duck it. Overhand or underhand front grip is up to you, but as before, overhand can make it easier to keep the wing down and less forward. If you’re riding with a wide stance, move your back foot forward, but ensure it remains offset so your heel is close to the centre line. This way, you won’t carve too hard. Check that the coast is clear and you have room to gybe.
Karine approaches, travelling gently upwind; she’s standing on the board. She checked her hands, wiggled her back foot forward and a tad further across, and looked around well!
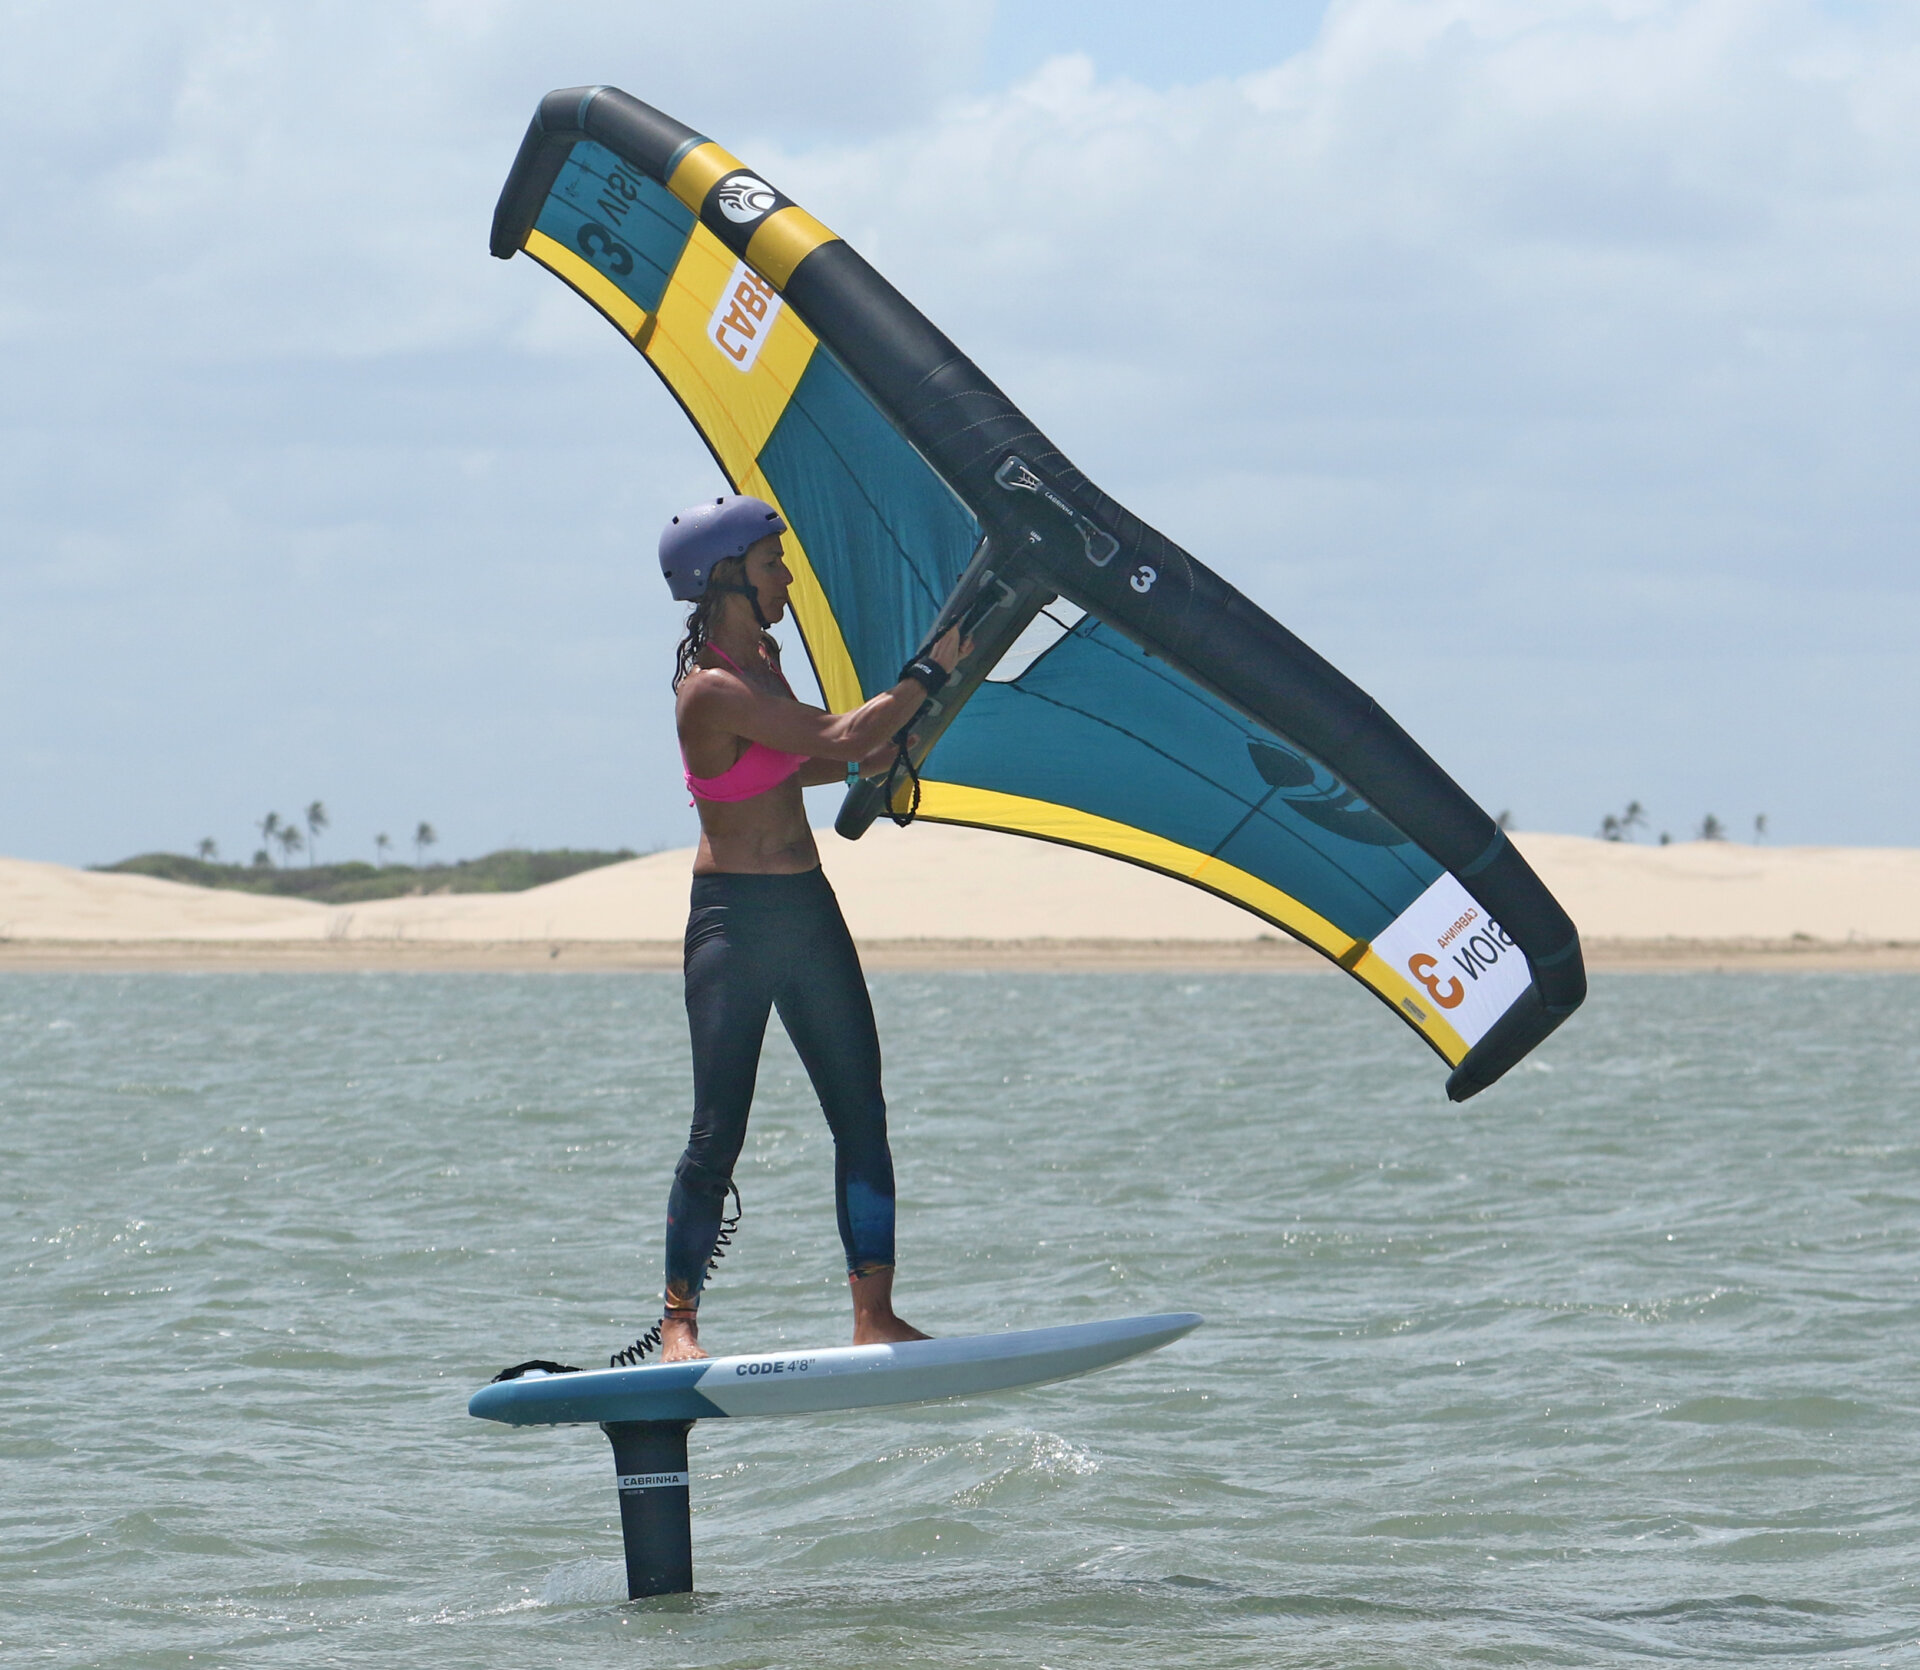
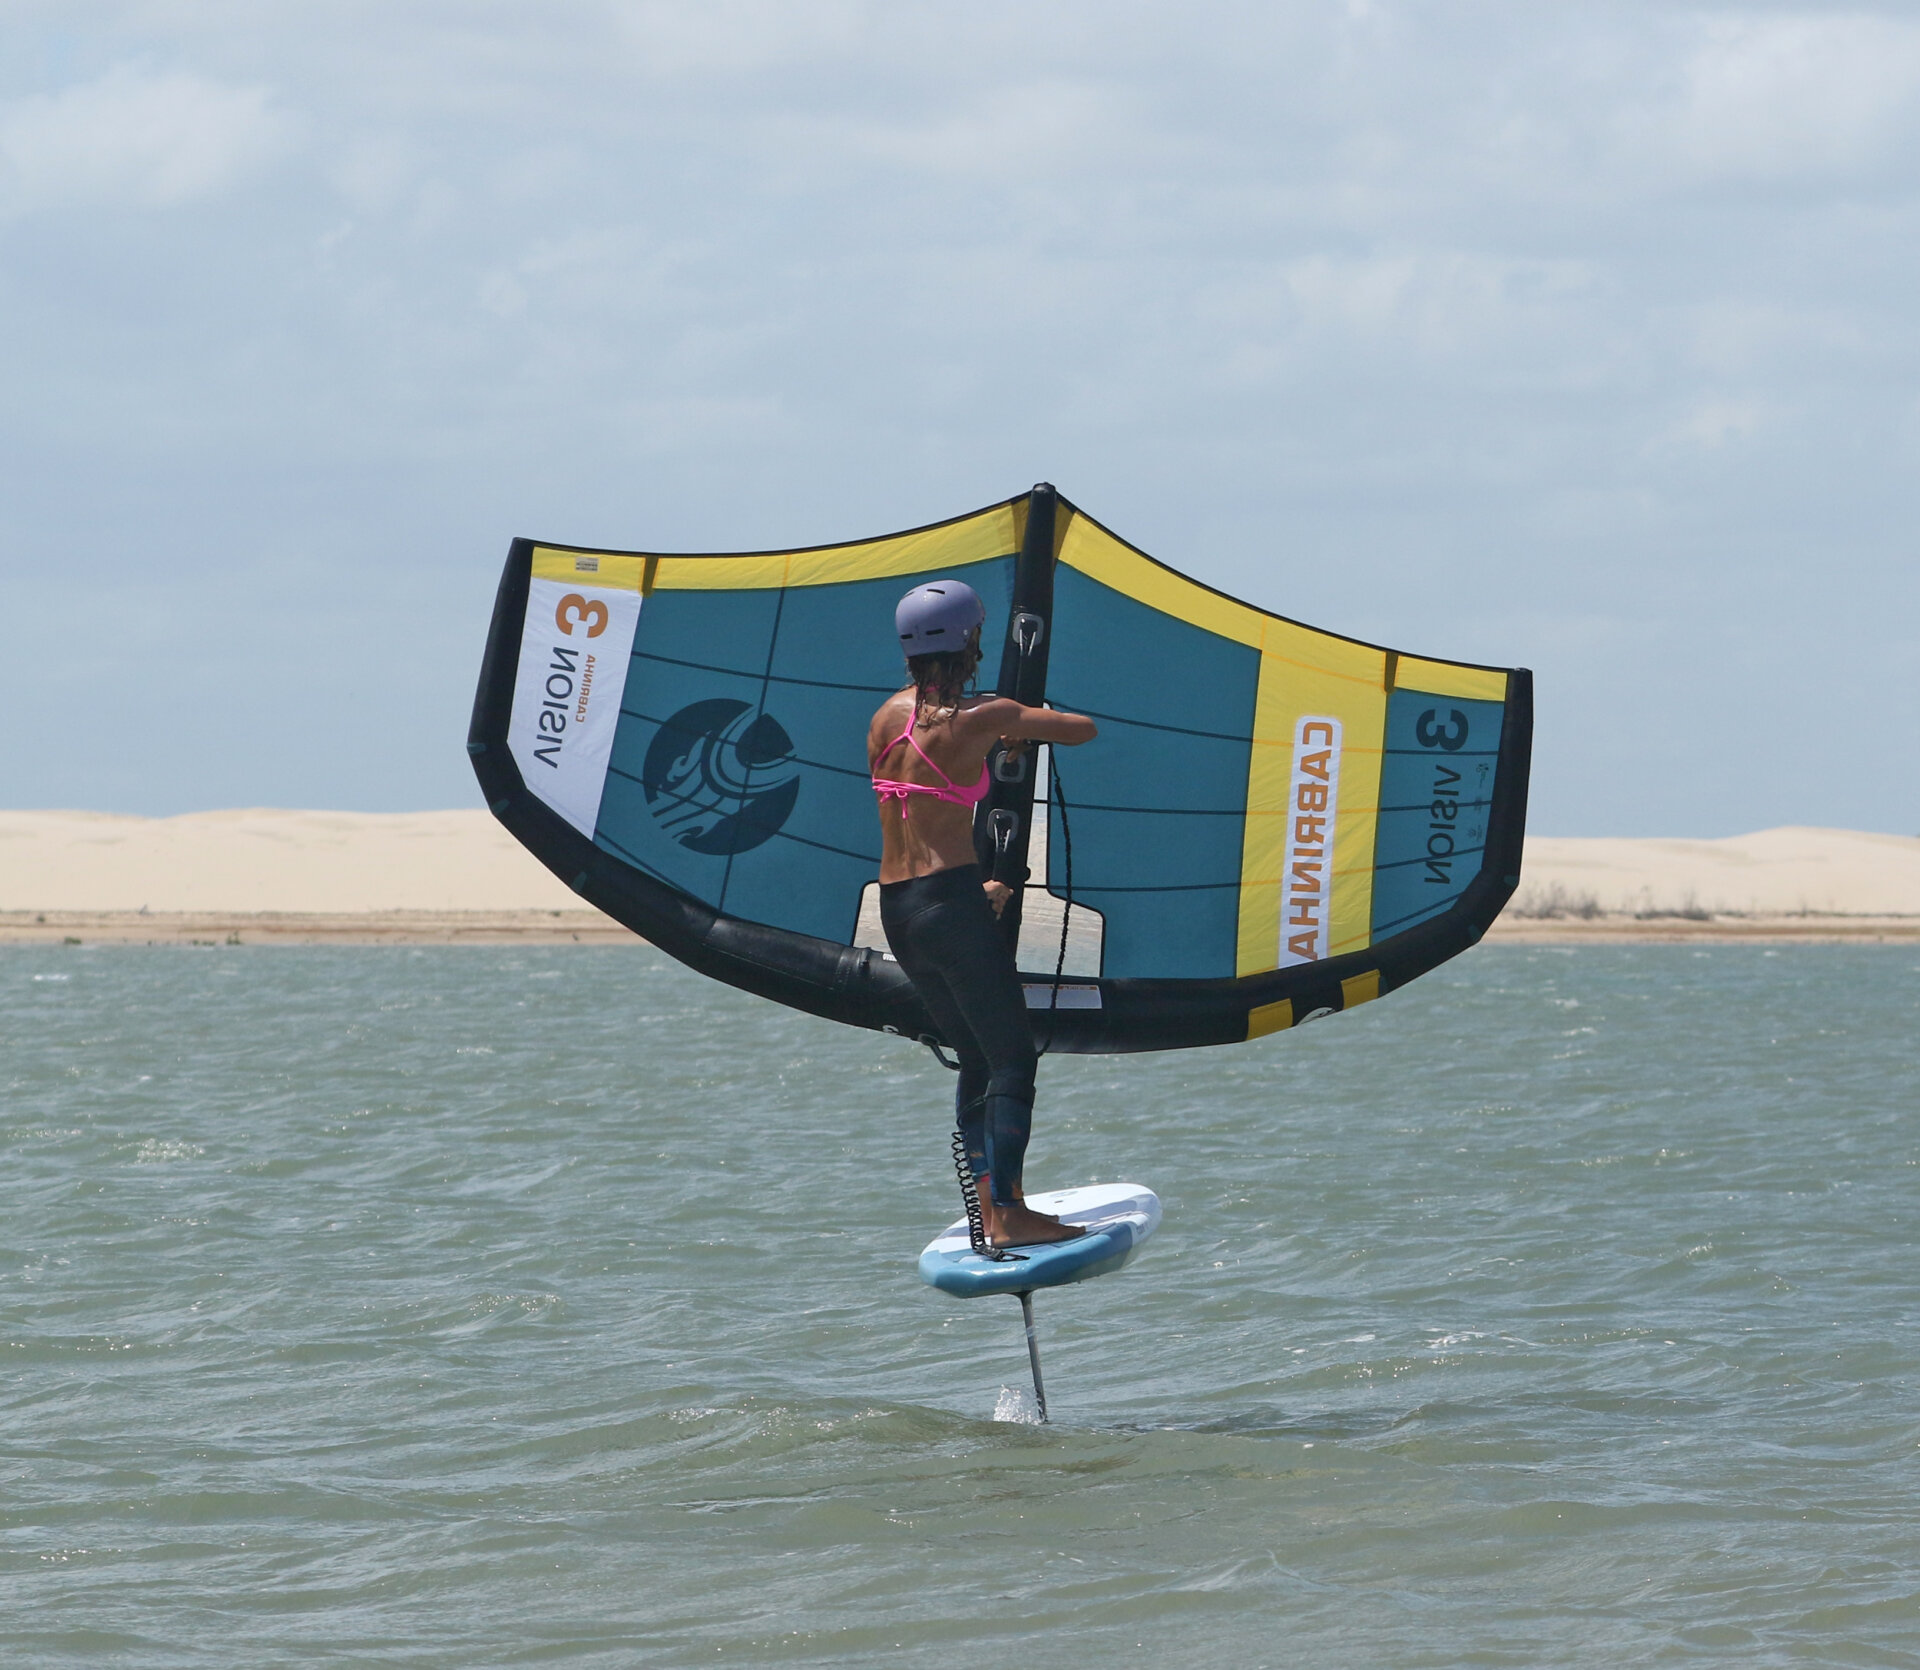
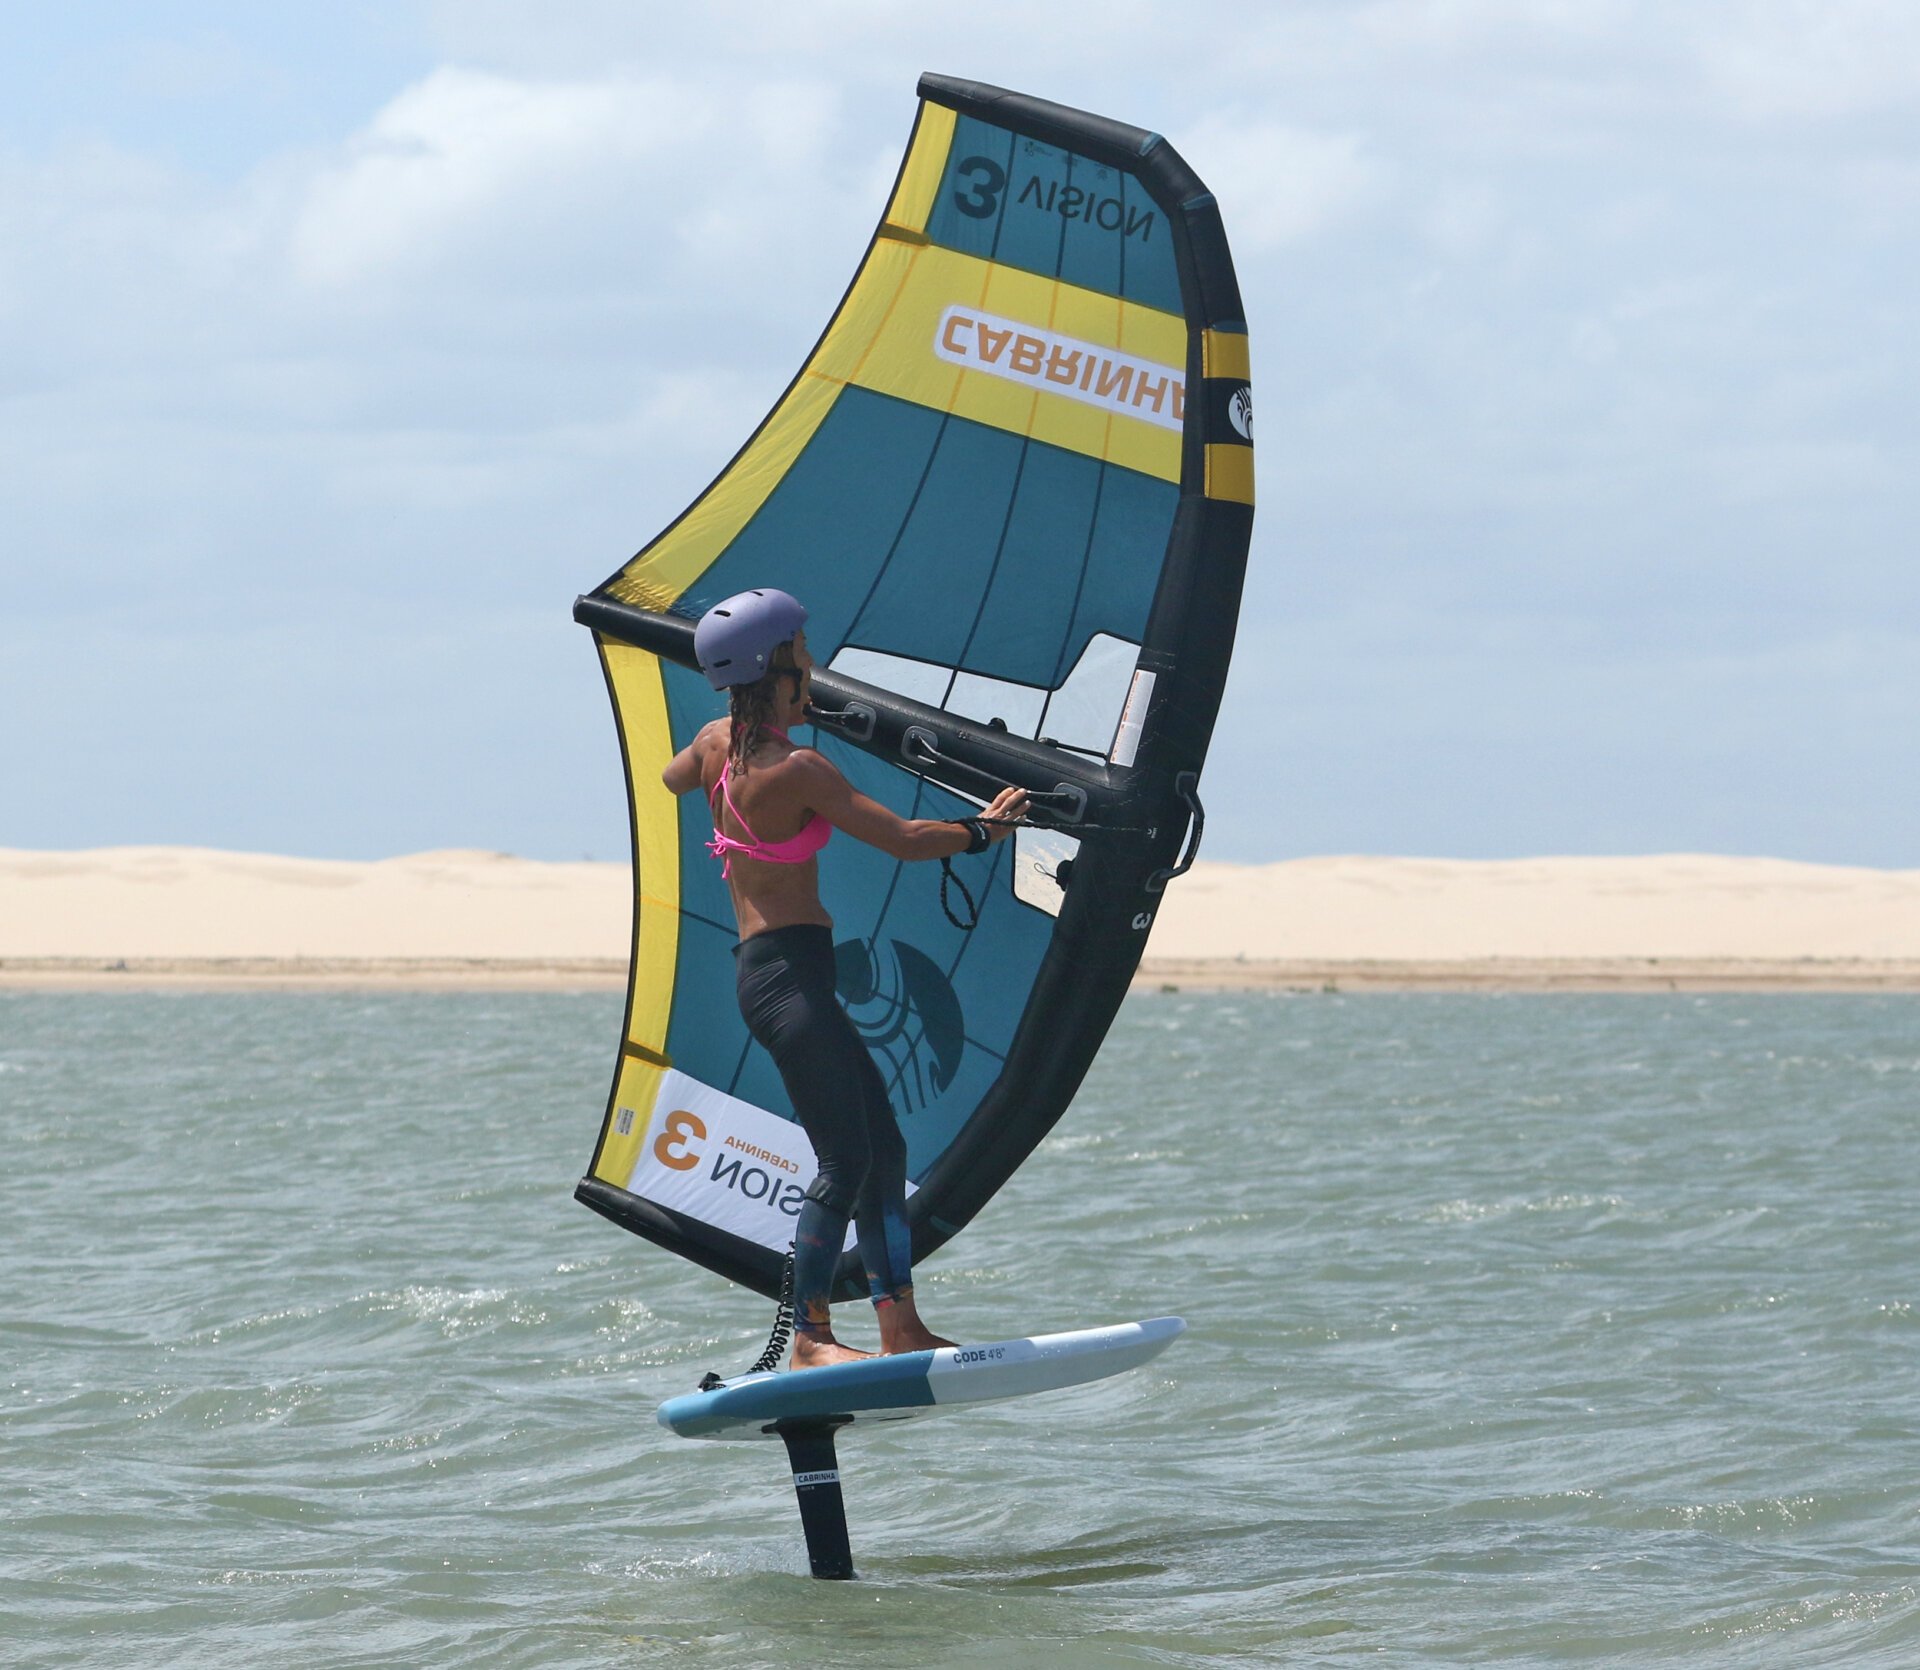
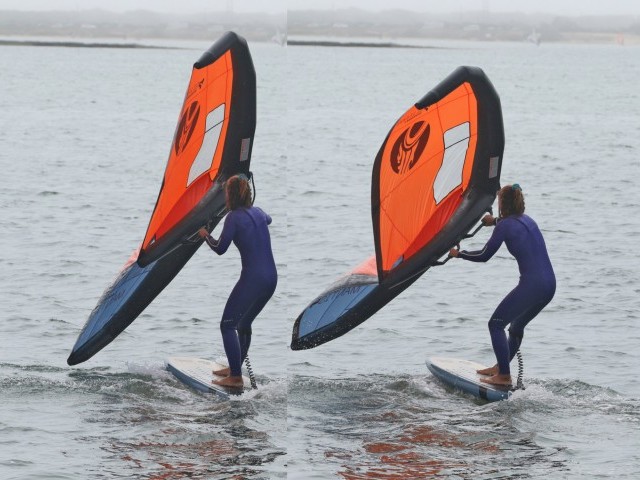
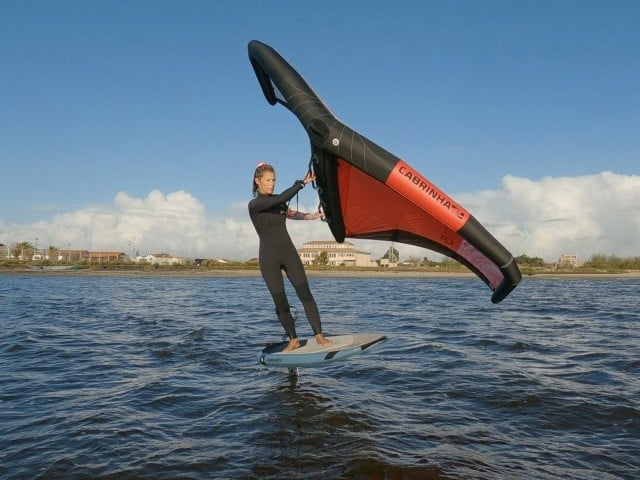
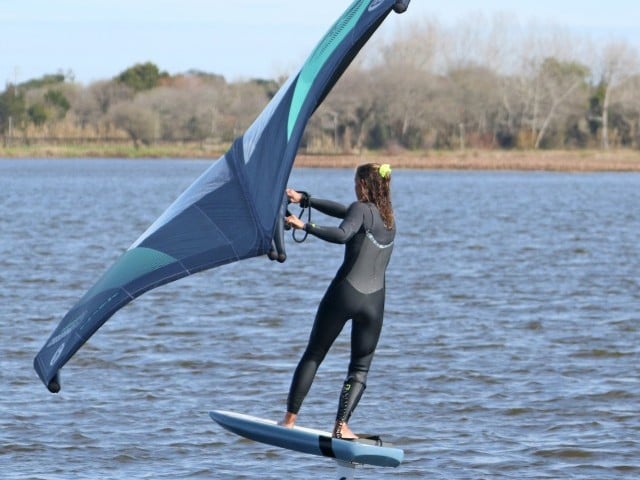
Bear Away Pic B.
As you approach the other side, try not to go upwind! Relax, and the board will flatten, allowing you to make sure that you’re balanced. Then, to bear away further, you’ll steer the board with your feet and use the wing more subtly. If you push the wing too far forward to help you bear away, it’ll fly to the outside of the turn and encourage your upper body to stay open, making the next few steps trickier. Feel the wind in your wing. You need some power but don’t want to sheet in hard, as this will fly your wing to the outside! You can see here that Karine has turned her board off the wind, tilting slightly as she uses her feet to steer and starts to carve gently. She’s holding her wing low and hasn’t sheeted in hard. Finally, look at her shoulders. Karine is turning her upper body to look down at the board and where she’s going. And she’s standing up over the board, balanced!
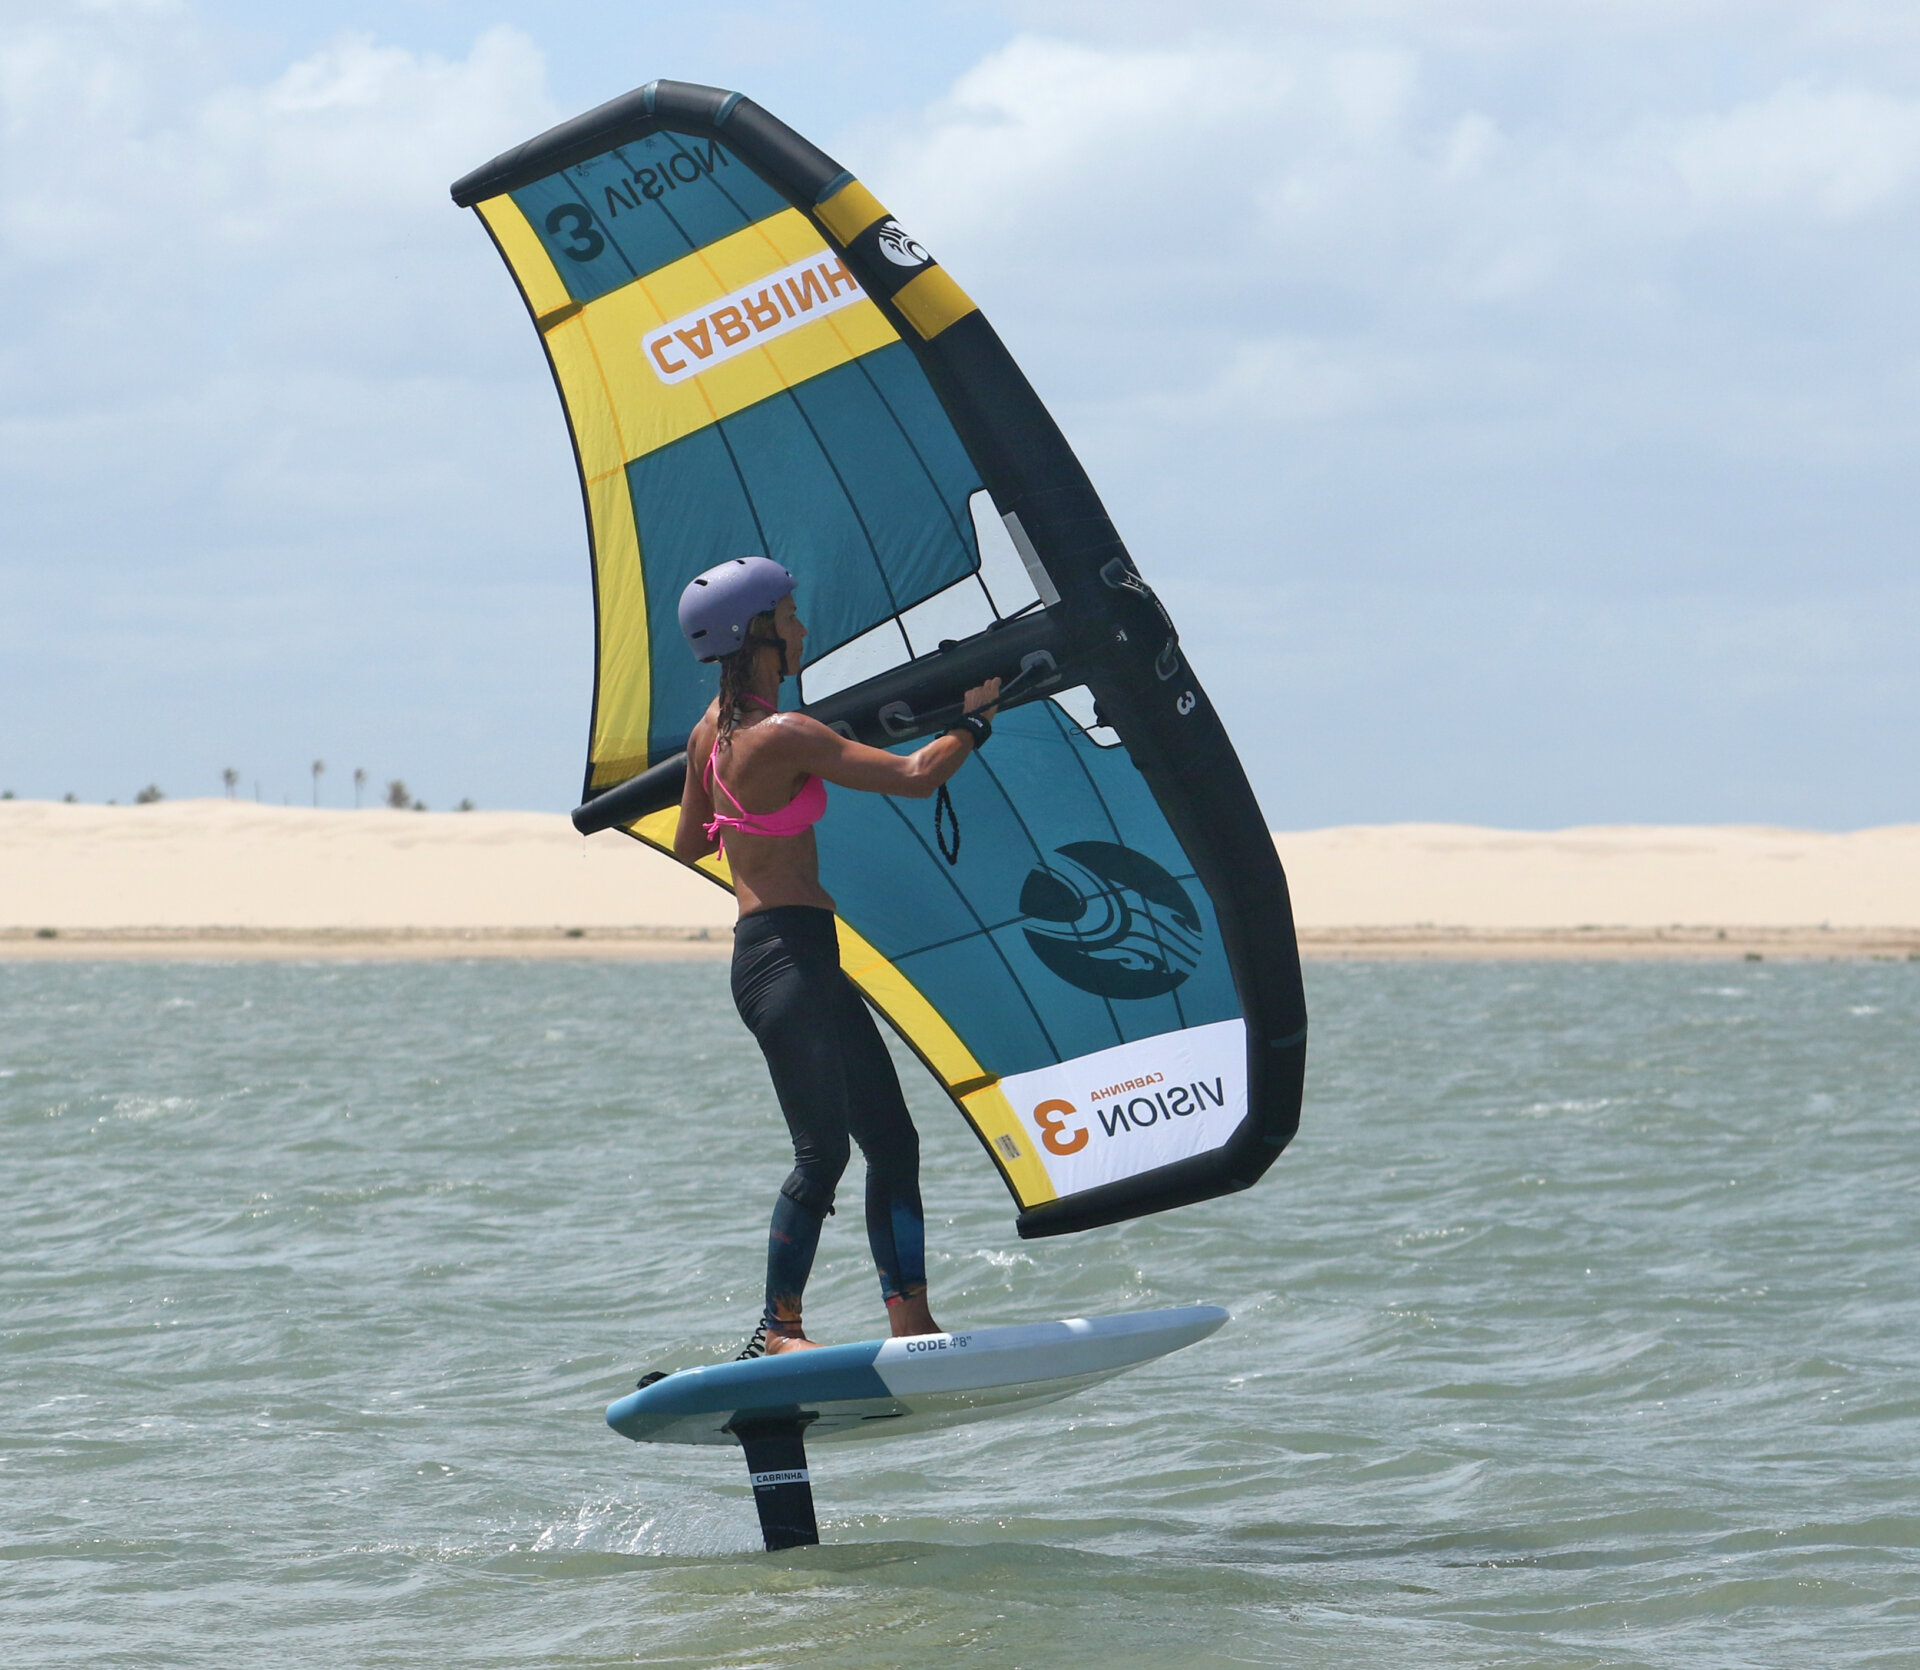
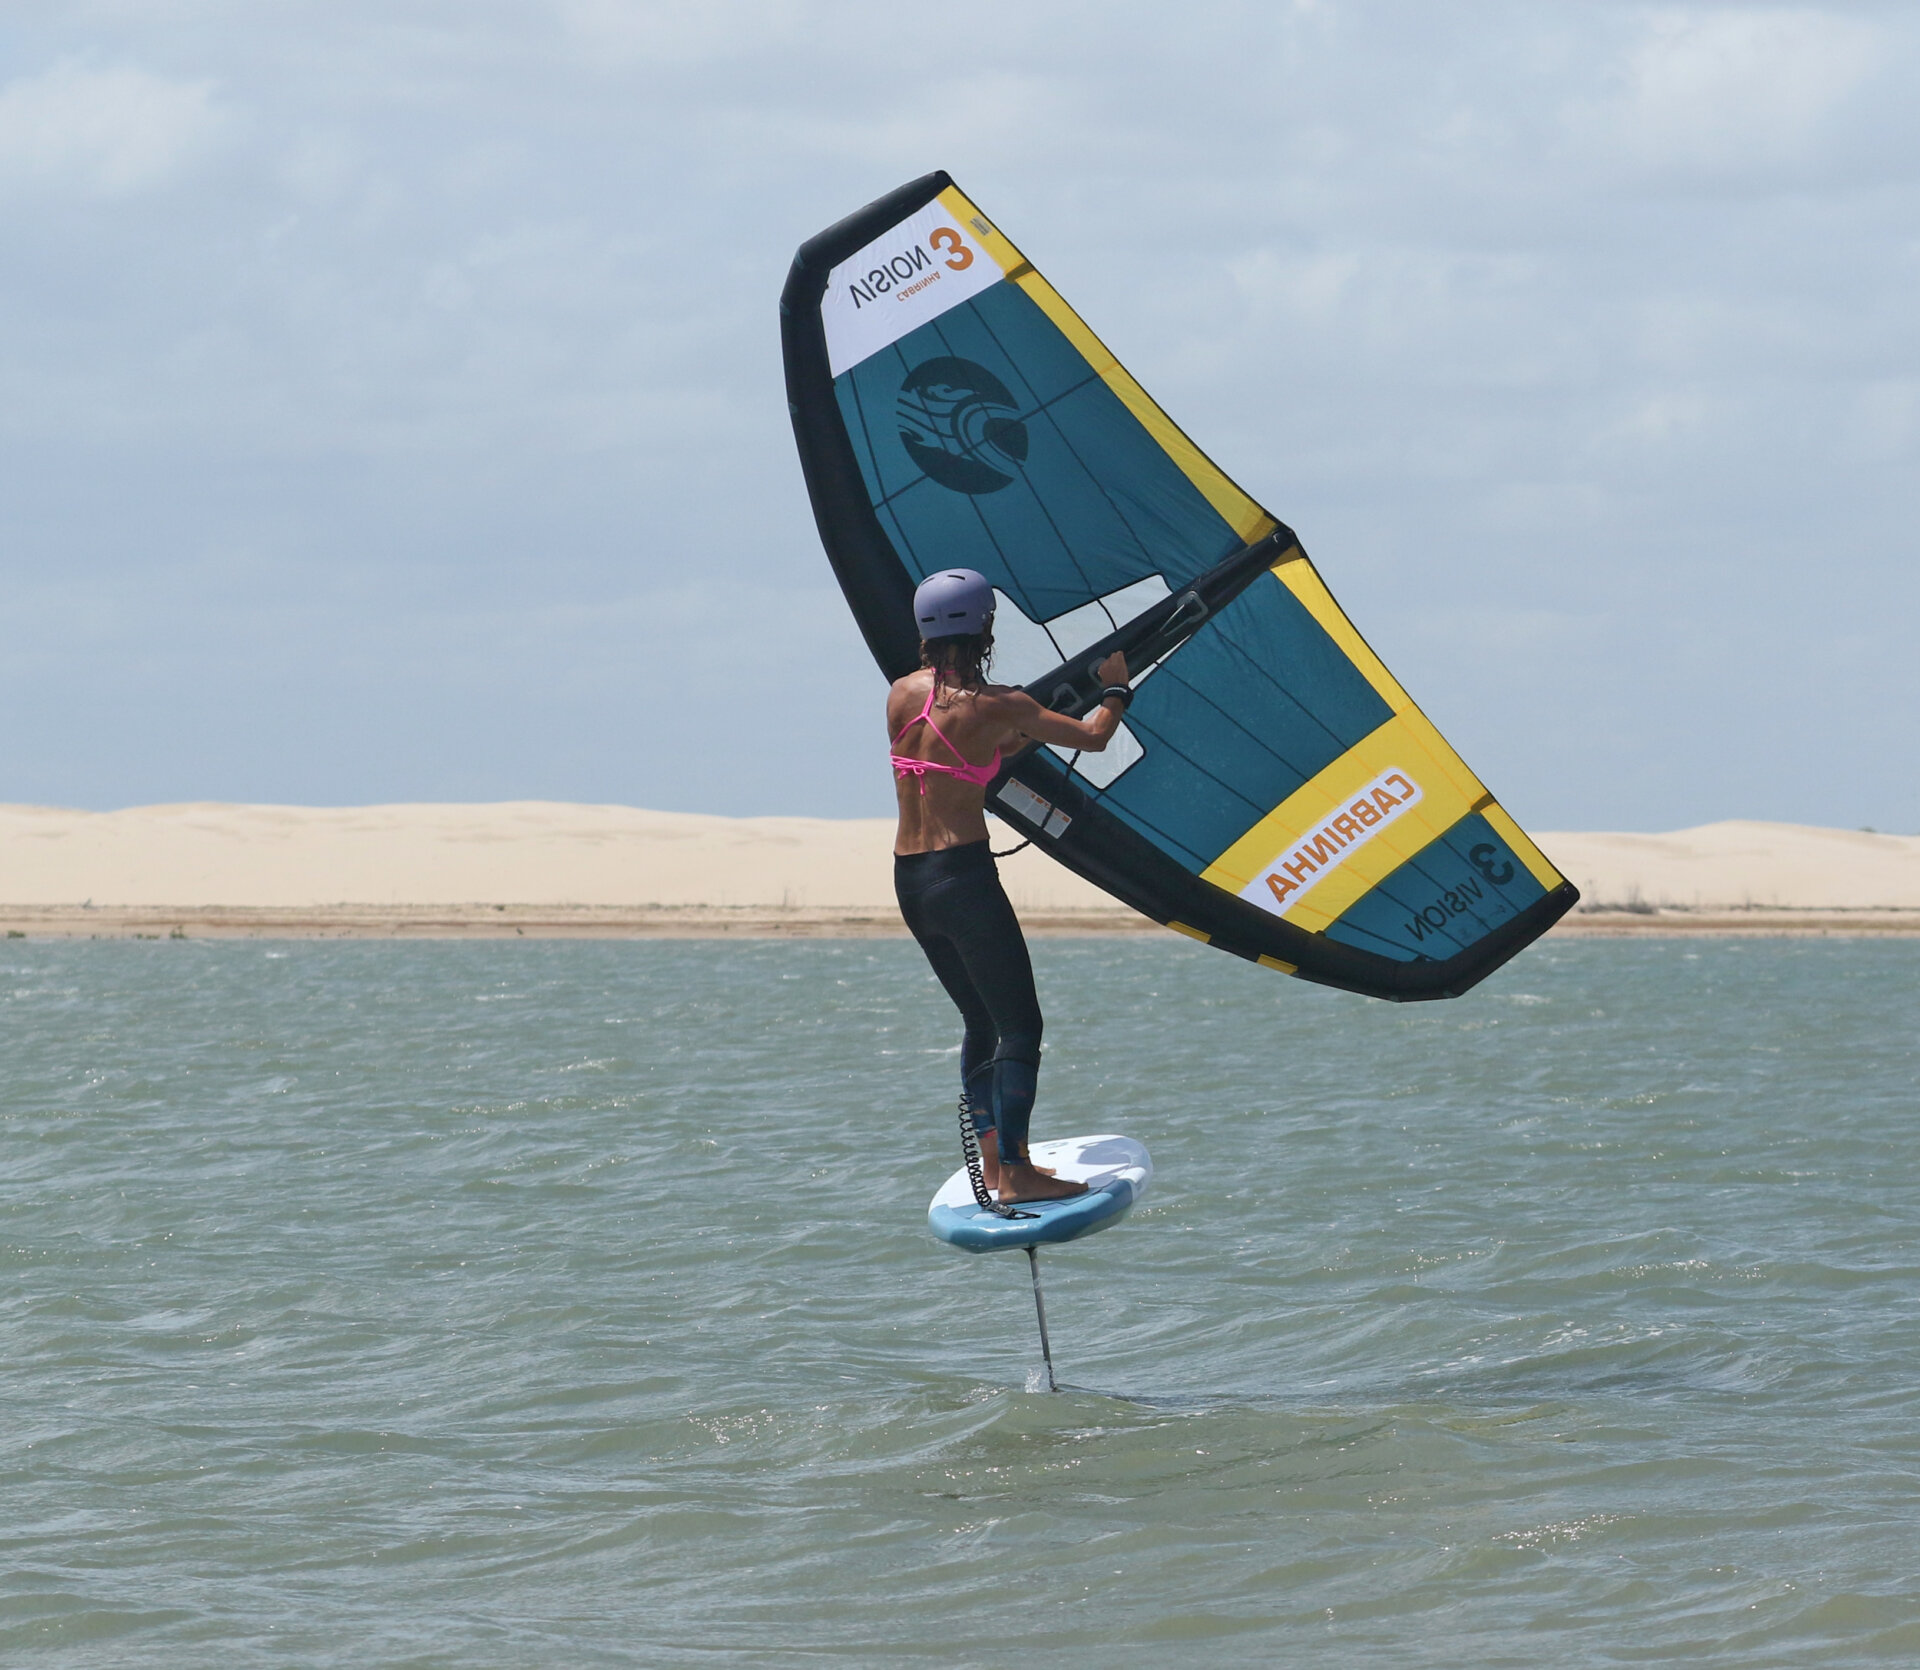
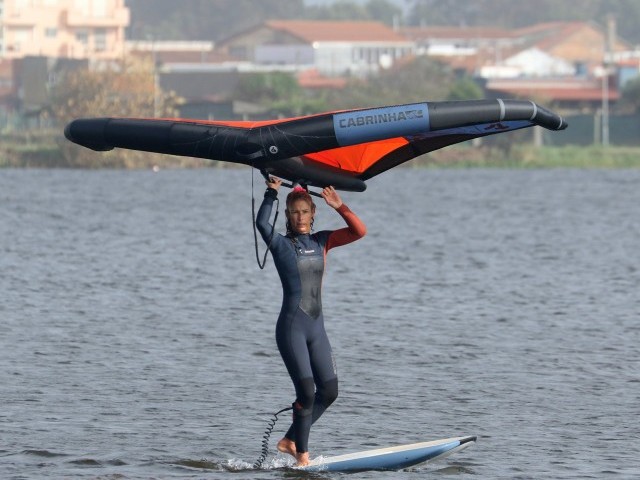
Carve Pic C.
Once the board turns off the wind, it will accelerate if you keep some wind in the wing. As it does, drop your weight a little more onto your heels to carve the board and foil. It doesn’t need anything rad, just enough to set your carve in motion. As you do this, keep your front hand over the board and your back hand to the inside of the turn, holding the power. Look where you’re going and face down the board. Here, Karine is on a broad reach and gently pressing onto her heels, flexing her knees whilst staying upright. As the board starts to carve, she keeps the power o, and the wing over her board using her front hand.
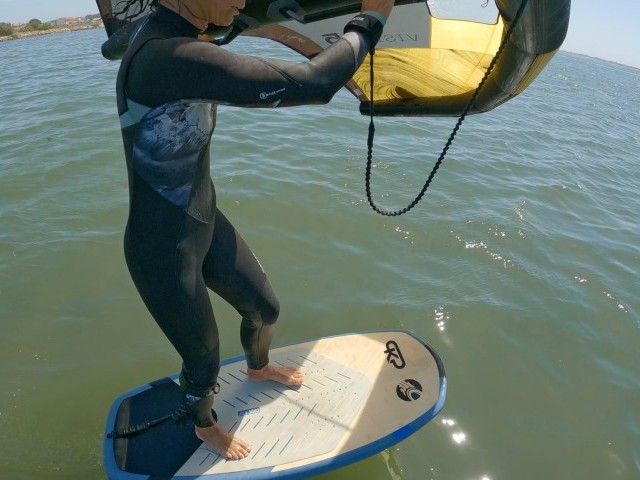
Keep Carving Pic D.
We have this same step in every gybe tutorial because it’s an absolute must. Once your foil is carving, it’s tracking around the corner, and if you can keep it banked, it’ll take you without any fuss. Soften your knees, flex your ankles and drop your weight onto your heels whilst staying balanced! As the board turns further, you’re searching for the moment. You’ll only find it if you sheet the wing in. As a result of accelerating, the wing should feel lighter, so pull your back arm in, and you can now allow your front arm to pull away. Twist your torso, and let the wing pull your front hand across the board. Karine’s board is banking nicely; she’s dropped her weight into a comfortable, balanced position with weight on her heels to keep her foil tracking around. She’s sheeted the wing in with her rear arm, pulling her hand towards her and allowing her front arm to pull away, twisting her upper body as it does. She’s still looking forward, not to the inside of the carve.
Bingo Pic E.
You’ve found it! Everything will feel less heavy with the wing sheeted in and the board carving downwind. It’s a sign. You don’t want to hold power through the downwind zone; it’s time to duck. Keep your backhand and weight committed to the carve, push your front hand across and downwards, release it, and dump any power in your wing. Look at Karine; her body is twisted, she’s soft and committed to the carve, she’s released her front hand early and is still stable, standing on her feet.
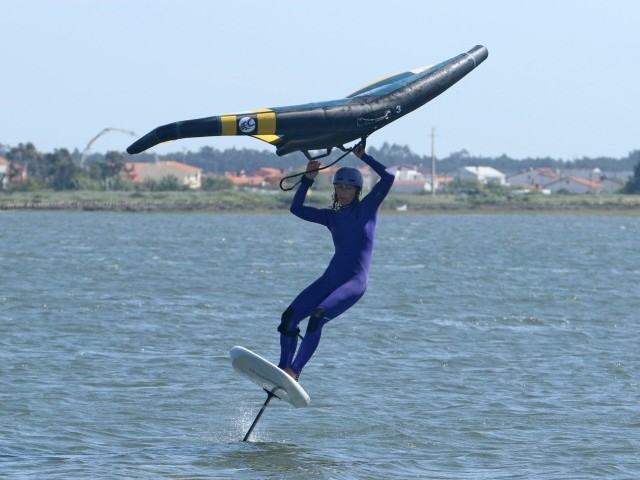
The Duck Pic F.
When you release your front hand, the wing will drop. If you sheeted in and twisted your upper body, it will end up inside the turn with no power. Keep your rear arm solid and hold the handle firmly. The wing inside will add some pressure to your heels, so try to tighten your carve. This is why having your back foot further away from the rail is a good idea. You don’t want to be in this hanging position for too long, so quick hands are a must. Here, Karine’s wing has swung into the inside of the turn; she’s holding it up with her rear hand and keeps looking forward to maintain a smooth carve. She’s going to be quick with her…
Hand Swap Pic G.
You must have both hands on their handles and the wing back up before you carve too far. Grab the rear handle, either above or below your other hand, preferably into an overhand grip, then reach down and grab your front handle with your new front hand. This needs to be quick, or you must be carving gently, as once you’re through the downwind zone, the wing will want to catch wind even in this nose-down position. Keep looking forward to keeping your arc longer. Karine juggled the wing and swapped her hands as quickly as possible whilst the wing was still hanging inside, close to her and without power.

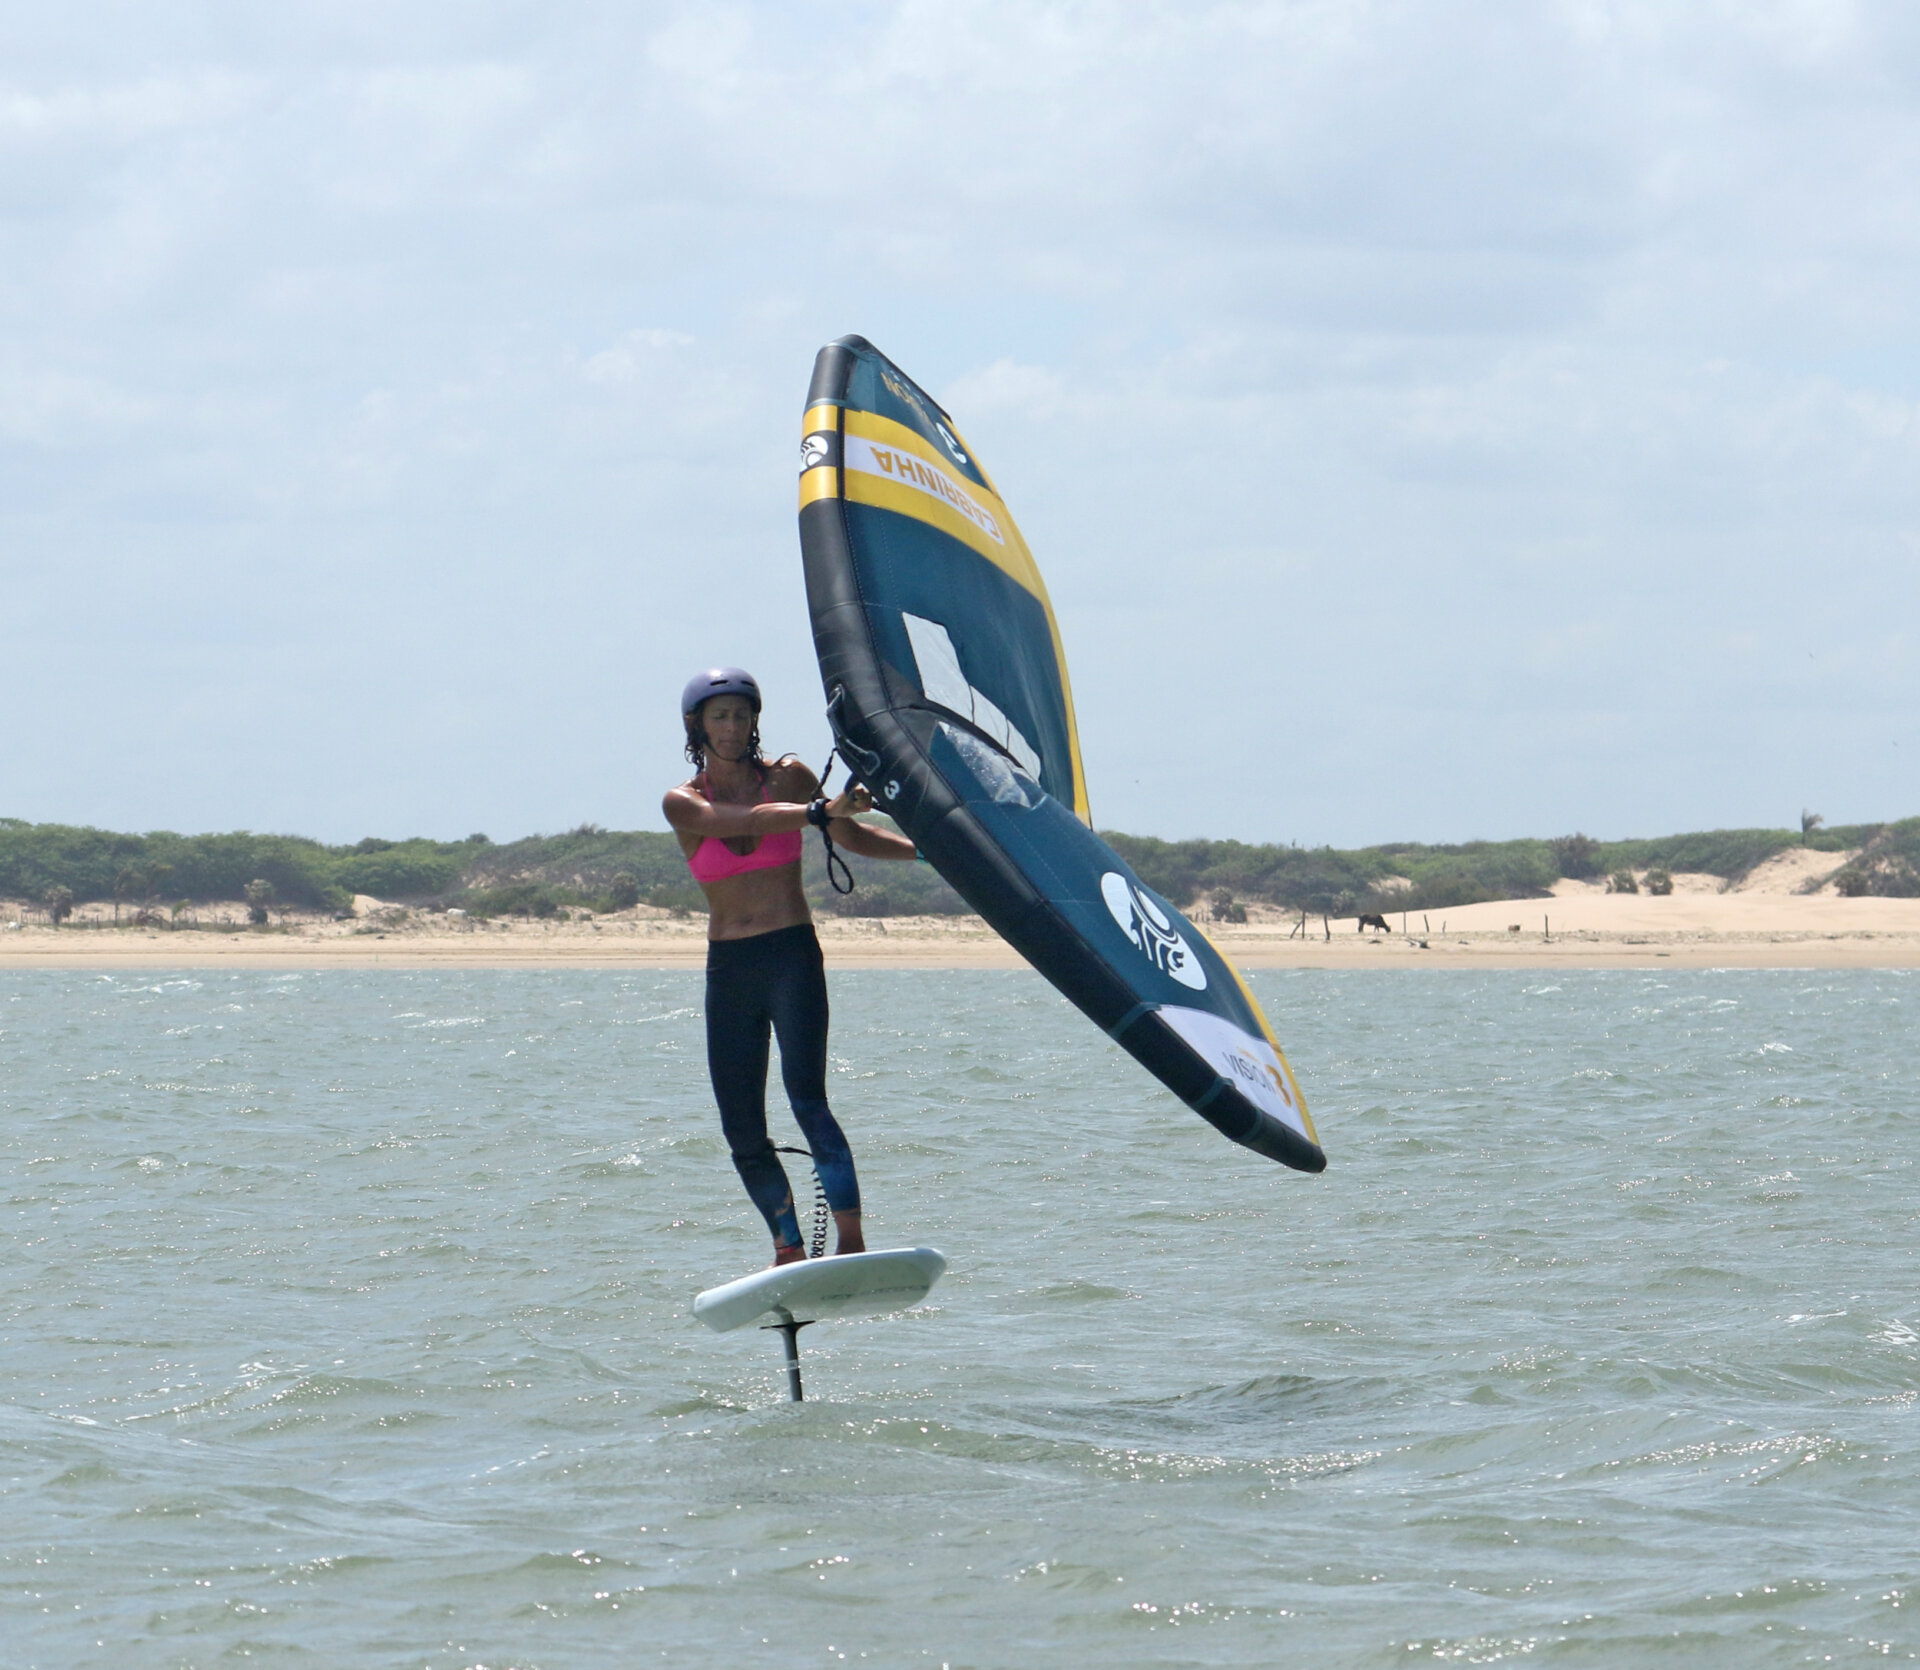
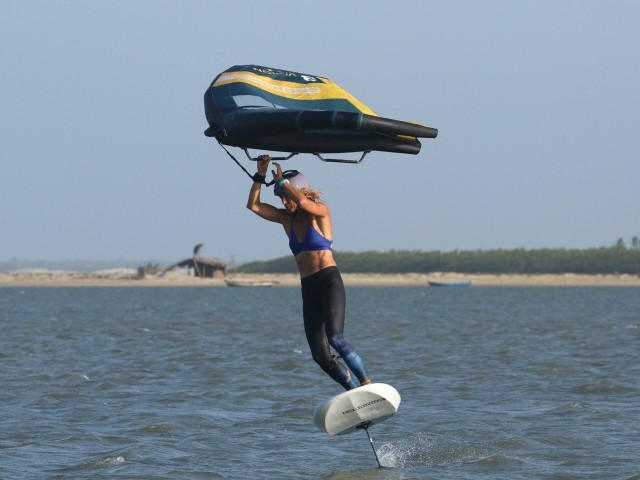
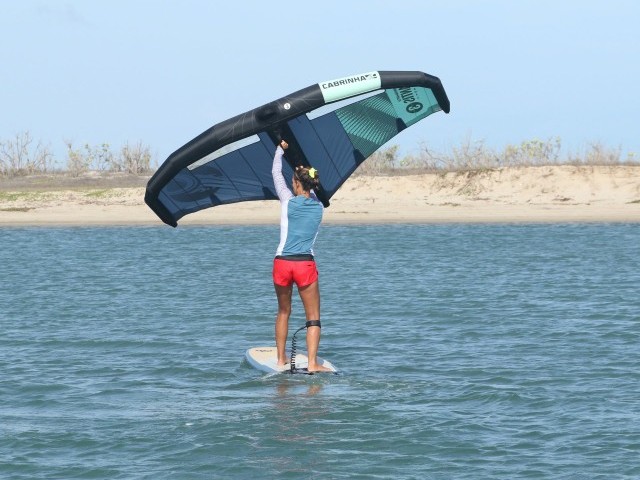
Wing Up Pic H.
You must get the wing back up and into position before powering it up. We’ve already mentioned that you need to do this sharpish, but you can help keep things calm by keeping the wing sheeted out as you lift it into position. To do this, keep your front hand close to your body as you lift the leading edge whilst simultaneously extending your back arm away from you. This pull-and-push action will allow the wing to open even if your timing or positioning is not spot on. If you feel that there is still too much pressure as you lift the front hand, you can release your back hand completely. Keeping her front hand in and close, Karine lifts her wing whilst aggressively sheeting out with her rear arm.
Claim It Pic I.
With your wing back where it belongs, pointing forward, you can steady yourself and turn your head and shoulders to look where you want to go so the board turns back upwind. Get the power back on and give yourself a hearty pat on the back, one beautiful toe toe-to-heel duck gybe in the bag:)
Top Tips
- It pays to practice the ducking action on Terra Firma when there’s no wind.
- We strongly recommend waiting for a day when you’re not too powered, and it’s not too windy!
- You can duck any wing size, but learning on a 4m will be easier than on a 7m.
- If the wind is light, you can use a bigger front wing. This way, you’ll be able to carve around more slowly, giving yourself time to feel for the moment and time for the movement.
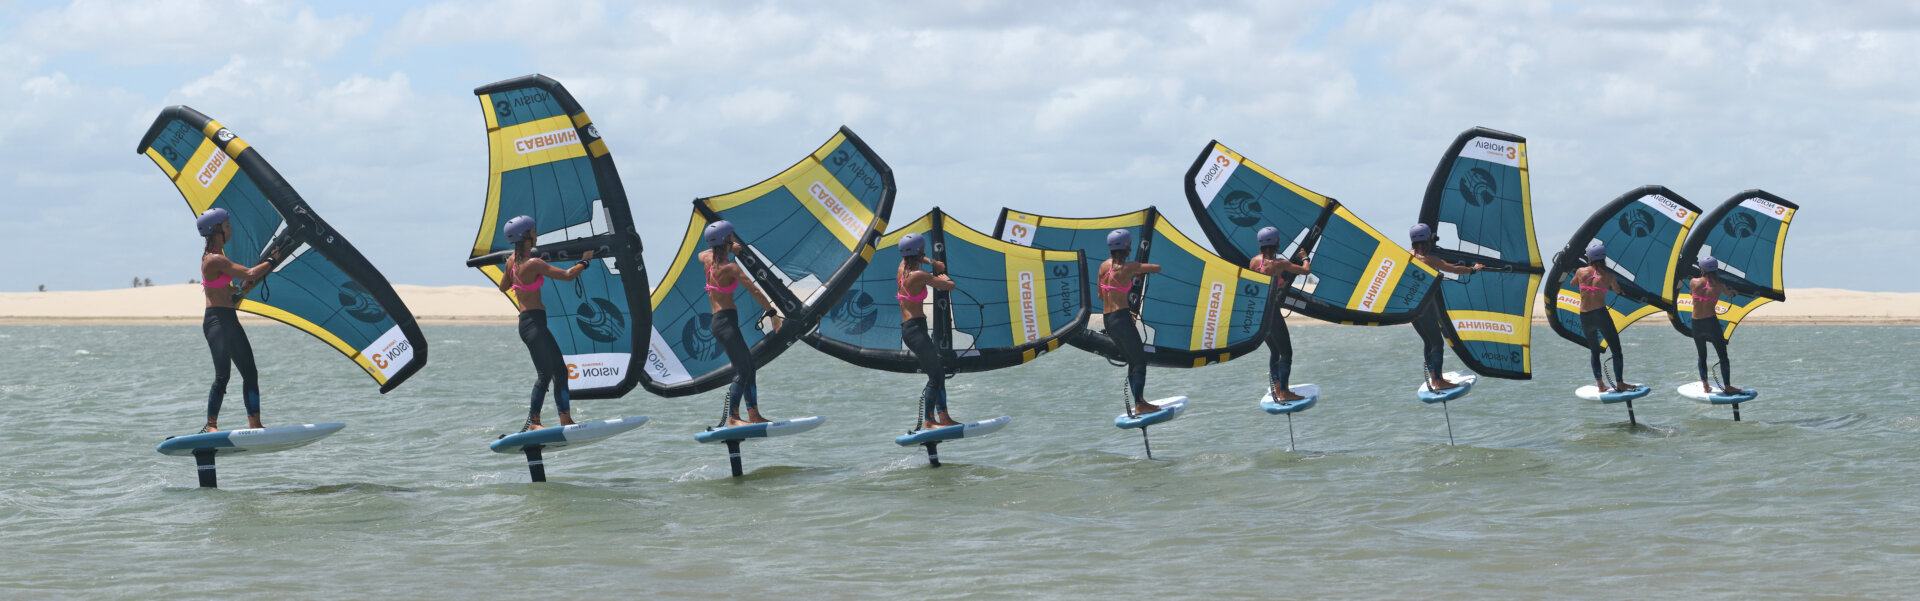
Right, check out the sequence to see it step by step. It has been stretched out so that you can see each individual part! Then, go have a butcher at the video.
Common Problems
- Assuming you’re happy getting your carve on, here’s a little look at what problems you might encounter with your win
- If your wing is powered as you duck it, it could force you to straighten out or make the hand swap impossible. Two potential issues are at play here.
- First, bring your backhand right in when you sheet in. This will only be possible if you allow your front hand to pull away. When you release your front hand, the wing will drop into the centre of your carve, almost parallel to your board, and therefore, it won’t hold any power.
- Secondly, don’t hold on with your front hand. It’s tempting to try and keep hold of your wing for longer than necessary to place it where you want it. However, it’s better to let go earlier with your front hand, which allows the wing to fall and swing to the inside.
- If your wing is powering past the hand swap, making it very tricky to lift, the following culprits may be responsible.
- If your wing doesn’t drop to the inside as above, then even if you let go early with your front hand, the wind will lie across the board and catch power when you grab it.
- Timing. The further around your carve and the later you lift, the more your wing will likely catch the wind. Whether you’re ducking too late, have a slow hand swap, or carving too hard. These will all result in you lifting the wing late about the wind.
- It’s also possible that you’re extending your front arm as you lift the wing in preparation to point it forward. Keep your front hand close and extend your back arm to dump any power.
Excellent, now it’s time to give it a go!
This technique article was in Issue 23 of Tonic Mag.
Related
By Christian and Karine
